
Tuning Resource Limits
Hint
You should read this section right after having read the Configuring GeoServer for robustness section.
Resource limits are settings to be configured for individual OGC services to limit the amount of resources dedicated to an individual request in order to improve fairness between requests, by preventing individual requests from hijacking the server and/or running for a very long time. It is obviously EXTREMELY IMPORTANT to properly configure them in production environment to avoid problems like:
- Frequent OOM Errors despite plenty of RAM
- Requests that keep running for a long time (e.g. CPU usage peaks even if no requests are being sent)
- DB Connection being killed by the DBMS while in usage (ok, you might also need to talk to the DBA...)
Relation with Control Flow
The Control Flow extension and the resource limits settings need to be configured together in order to ensure that a proper setup has been performed. Setting resource limits properly will ensure that individual requests will not consume too many resources (fairness) while properly configuring Control Flow will ensure that we will not be overwhelmed by a huge number of parallel requests.
In general a client can bring a server application to its knees by either sending too many requests in parallel to exceed its scalability limit or by sending resource intensive requests or a combination of both of them. To protect GeoServer from both situations you need to configure resource limits as well as Control Flow properly.
Relation between WMS resource limits and other timeouts
When setting the WMS timeouts we need to think in larger terms and make sure that all the elements in the GeoServer response chain are configured accordingly. The elements that we might need to take into account when configuring the WMS Timeout are mainly:
- LifeTime of DB Connection (usually long)
- WaitTime for a new connection
When a WMS request hit GeoServer, we will do the following steps:
- A new thread will be created by the Application Server. This is usually not heavy
- The request is parsed and we allocate a buffer in memory to respond. The WMS Timeout triggers.
- We start to grab resources in a Thread and we render them in a separate one to reduce the impact of I/O Waits
- We release resources
- We do the encoding
- We stream the encoded image
Let us focus on data that comes from a DBMS. On average, it is safe to state that we will use the connection for 75% of the time needed to answer the request (to pump the data to render) and - even if the encoding can be heavy - the remaining 25% for encoding. Ok, assuming that the buffer for drawing has been already instantiated before we try to acquire a connection and that the WMS timeout trigger has already triggered it is obvious that the DBMS WaitTime needs to be configured accordingly: we often see people configuring WaitTime blindly to 20 seconds but in reality nobody will wait for more than 2 or 3 seconds for a WMS image; setting the WMS timeout to a value which is smaller than the WaitTime might result in too many requests holding memory for too much time! Once a request has been accepted by GeoServer and we start processing it, i.e. moving it from the boundaries (parsing engine) to the core of GeoServer (rendering and I/O engine) we need to make sure that it does not get parked because it does not have the resources it needs and if that happens it fails quickly and release resources for other requests.
Testing Resource Limits for WMS
The following section explains how GeoServer performances are improved when setting the resource limits for WMS.
Preliminary Steps
Open your Web browser and navigate to the GeoServer Welcome Page.
Go to Stores and select
stormsDataStoreChange the following parameters:
Name Value max connections 1 Connection timeout 20000000 It should appear something like this:
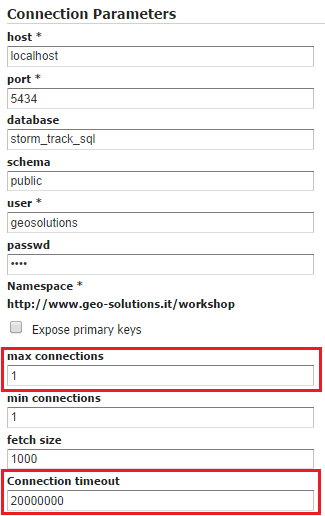
Change `storms` parameters
Now you have configured this store to enqueue all the requests in a single queue until they are not timed out.
Configure JMeter
Go to
$TRAINING_ROOT/data/jmeter_dataand copy the filetemplate.jmxfile and createlimit.jmxFrom the training root, on the command line, run
jmeter.bat(orjmeter.shif you’re on Linux) to start JMeterOn the top left go to File –> Open and search for the new jmx file copied
Disable all the Thread Groups except for the 64 one in order to create a test environment with multiple concurrent requests to be enqueued.
In the
CSV Data Set Configelement, modify the path of the CSV file by setting the path for the filelimits.csvin the$TRAINING_ROOT/data/jmeter_datadirectoryIn the HTTP Request Default element modify the following parameters:
Name Value layers geosolutions:storm_obs srs EPSG:4326
Test without WMS Limits
Run the test
Note
Remember to run and stop the test a few times for having stable results
You should see something like this:
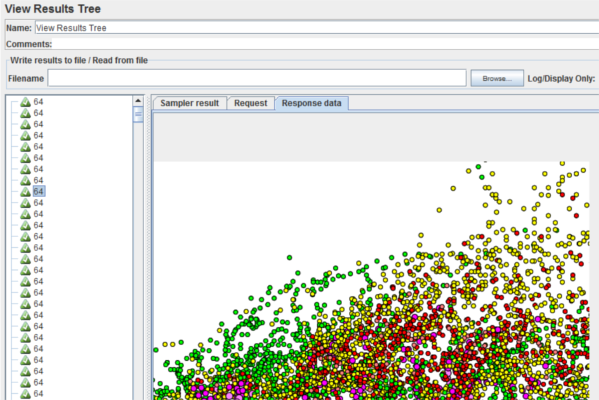
View Results Tree
When the test is completed, Save the results in a text file and remove them from the console by clicking on Run –> Clear All on the menu
Configure WMS Limits
On your Web browser, navigate to the GeoServer Welcome Page.
Go to WMS and edit the Raster Rendering Options section:
Name Value Max rendering time 10 
Changing WMS limit configuration
With this option, GeoServer will cut off all the requests that need more than 10s to be rendered, making GeoServer more responsive. Note that this will result in various error returned by GeoServer for those operations which are cut off. You can choose another value to set. For having a good result you should take a value minor than the average response time of the first test.
Test with WMS Limits
Run again the test. You should see multiple errors like this:

Exceptions caused by maximum rendering limit exceeded
You may see that the throughput is increased because most of the timed out requests have been removed. With this kind of configuration you can control the responsiveness of your GeoServer by removing stale requests instead of waiting for them.
Note
At the end of the test remove the limits and restore the previous configuration of the storms DataStore