
Customizing KML Placemark with Templates
In KML, each entry in a data set is represented with a placemark. A placemark has a title and a description which is shown in a pop-up bubble when the placemark is clicked on. With templates placemark titles and descriptions can be easily customized. This section covers the task of creating custom title and description templates.
Open the following link to open the
storm_obslayer in superoverlay mode:http://localhost:8083/geoserver/wms/kml?layers=geosolutions:storm_obs&mode=superoverlay
Warning
If Google Earth will not automatically open, go to the system default download folder and double click on the downloaded kml file geosolutions-storm_obs.kml. Zoom-in if you don’t see the storm-obs layer.
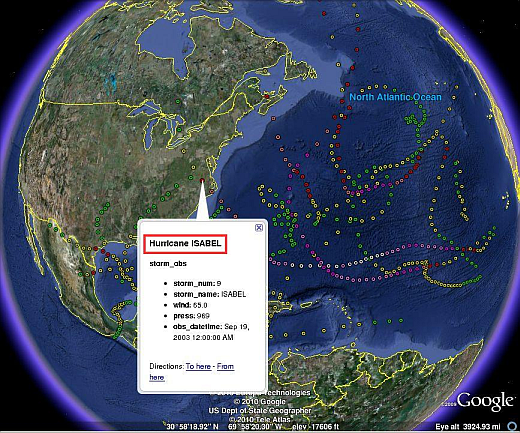
In Google Earth click on a placemark.
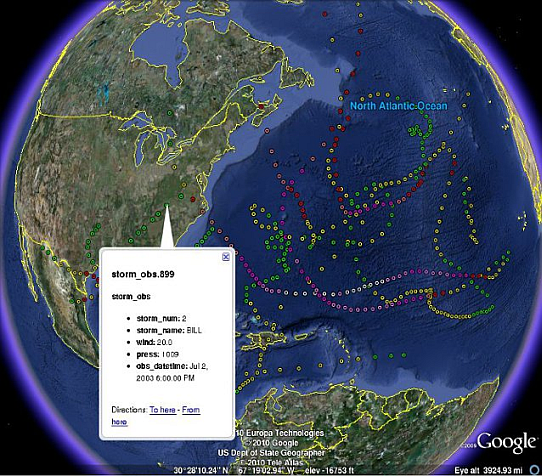
Viewing the default placemark description
On the file system navigate to the GeoServer data directory located at
%TRAINING_ROOT%\geoserver_data\on Windows or${TRAINING_ROOT}/geoserver_data/on Linux.
Warning
You have to use slash ( / ) instead of backslash ( \ ) on Linux paths, when this one is the unique difference, the linux paths will not be described in this chapter.
In the
workspaces\geosolutions\storms\storm_obsdirectory create a new filed namedtitle.ftl.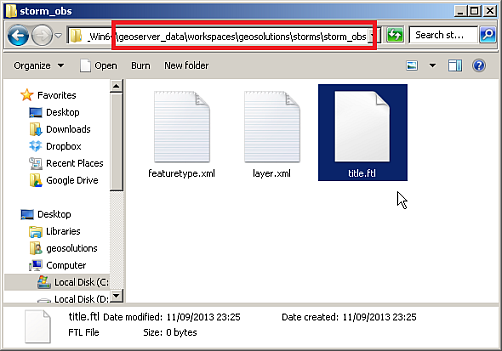
Creating a title template
Note
The
title.ftlis a template that will be used to render the title of a placemarkOpen
title.ftlin the plain text editor of your choice (f.e. notepad) and enter the following content:Hurricane ${storm_name.value}Note
The above template content inserts the value of the storm_name attribute. When the template is rendered it will dynamically create a title that is the name of the hurricane.
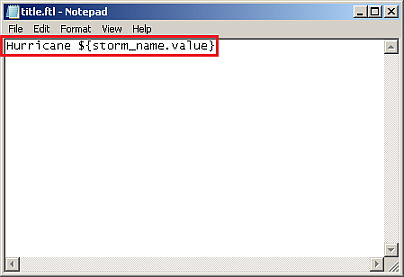
Creating title template content
In Google Earth refresh the view by expanding
stom_obs.kmzunder “Temporary places”, right clicking ongeosolutions:storm_obs, and clicking on the refresh menu item: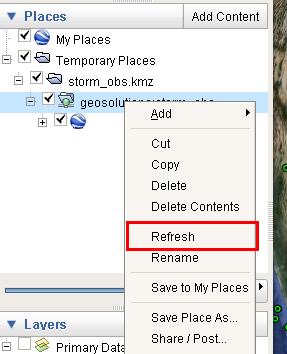
Forcing the refresh of a KML tree
Click on a placemark to see the new template in action:
Viewing a custom placemark title
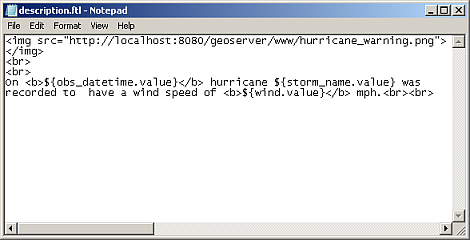
In the same directory as
title.ftlcreate a file nameddescription.ftl. Open the file and enter the following content:<img src="http://localhost:8083/geoserver/www/hurricane_warning.png"></img> <br> <br> On <b>${obs_datetime.value}</b> hurricane ${storm_name.value} was recorded to have a wind speed of <b>${wind.value}</b> mph. <br> <br>Note
The above template renders some HTML that contains a static image of a hurricane warning, as well as creates a paragraph of text describing in sentence form some information about the specific storm observation.
Creating description template content
Save
description.ftland refresh the view in Google Earth.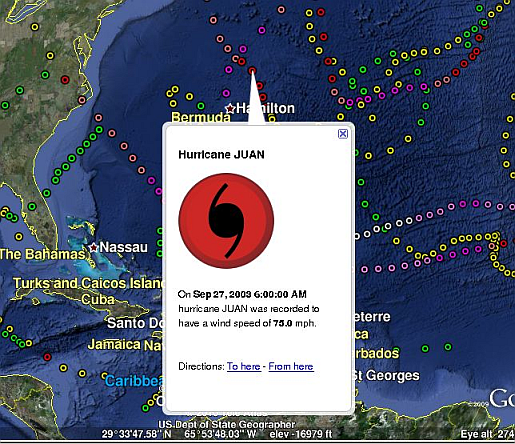
Viewing a custom description placemark description
In this section templates were used to customize placemark visualization. In the next few sections the use of templates for other visualization purposes will be explored.