
Layer level security
GeoServer allows access to be determined on a per-layer basis. Access to layers are linked to roles. Layers and roles are linked in a file called layers.properties which is located in the security directory in your $geoserver_data folder (%geoserver_data% in Windows).
Note
The syntax for setting security is as follows (parameters in brackets [] are optional):
namespace.layer.permission=role[,role2,...]where:
- namespace is the name of the namespace. The wildcard * is used to indicate all namespaces.
- layer is the name of a featuretype or coverage. The wildcard * is used to indicate all layers.
- permission is the type of access permission (r for read access, w for write access and a for admin access).
- role[,role2,...] is the name(s) of predefined roles. The wildcard * is used to indicate the permission is applied to all users, including anonymous users.
Data Access Rules
From the Welcome page click the Data link on the Menu Security section.
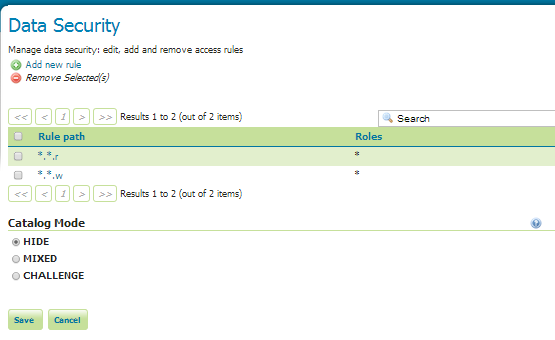
The Data access rules list
Note
You have to be logged in as Administrator in order to activate this function.
Click Add new rule in the top menu and enter the following configuration:
- Select
geosolutionsfromWorkspacecombo box. - Select
CountiesfromLayercombo box. - Select
ReadfromAccess modecombo box. - Select the ROLE_WS created in Managing Users and Roles section and press the right arrow at the center of the window.
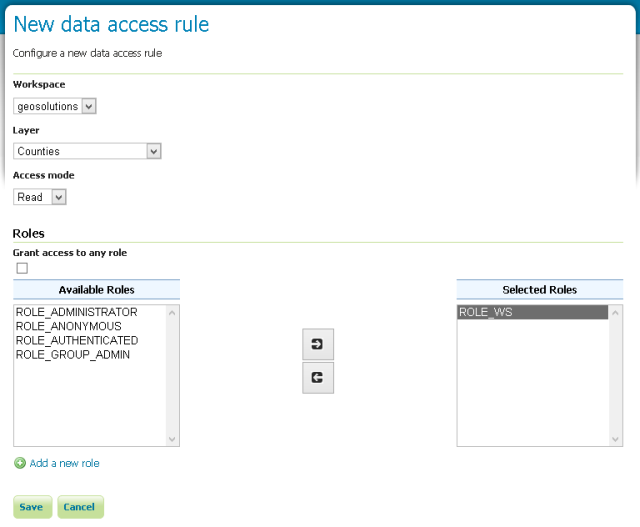
The new data access read rule for ROLE_WS
- Select
Click the Save button.
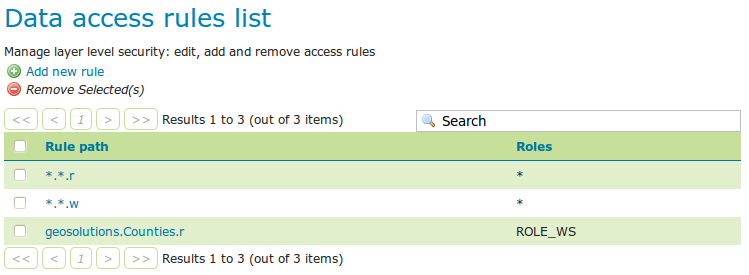
The new Data access rules list
Click Add new rule in the top menu and enter the following configuration:
- Select
geosolutionsfromWorkspacecombo box. - Select
CountiesfromLayercombo box. - Select
WritefromAccess modecombo box. - Select the ROLE_WS created in Managing Users and Roles section and press the right arrow at the center of the window.
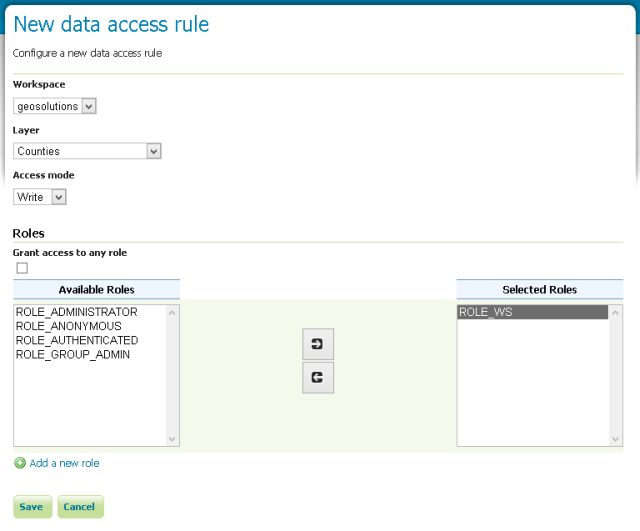
The new data access write rule for ROLE_WS
- Select
Click the Save button.
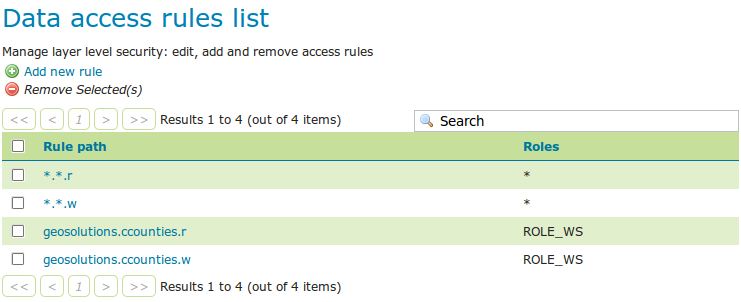
The new Data access rules list
With this setup most of the layers are generally accessible read/write from all users, but the Counties one can now be
accessed only by users having the ROLE_WS, or the administrator (which is all powerful). Then, the system works pretty much
like CSS selectors in HTML, the most specific rule wins.
The catalog mode directive specifies the way in which GeoServer will advertise secured layers and behave when a secured layer is accessed without the necessary privileges. The options are:
| Option | Description |
|---|---|
hide (default) |
Hides layers that the user does not have read access to, and behaves as if a layer is read only if the user does not have write permissions. The capabilities documents will not contain the layers the current user cannot access. This is the highest security mode. Because of this, it can sometimes not work very well with clients such as uDig or Google Earth. |
challenge |
Allows free access to metadata, but any attempt at accessing actual data is met by a HTTP 401 code (which forces most client to show an authentication dialog). The capabilities documents contain the full list of layers. DescribeFeatureType and DescribeCoverage work fine. This mode works fine with clients such as uDig or Google Earth. |
mixed |
Hides the layers the user cannot read from the capabilities documents, but triggers authentication for any other attempt to access the data or the metadata. This option is useful if you don’t want the world to see the existence of some of your data but you still want selected people to whom you give direct data access links to get the data after authentication. |
Admin Rule
The admin mode grants a role to access Workspace and Layer Configuration pages. As such it is not affecting OWS requests (WFS, WMS, WCS and WMTS).
A data access rule with admin level needs to be defined at a workspace level; access will then be granted to the configuration page of the selected workspace and of the contained layers, while an admin rule defined for a layer will not cause any effect.
To add a new Admin rule:
- Click Add new rule in the top menu and enter the following configuration:
- Select
geosolutionsfromWorkspacecombo box.- Select
AdminfromAccess modecombo box.- Select the ROLE_WS created in Managing Users and Roles section and press the right arrow at the center of the window.
- Click the Save button.
The user with ROLE_WS will now have access to the configuration pages of geosolutions Workspace and to the contained layers’ configuration pages.
Security Tab
Layer, Layer Group and Workspace configuration pages provide an alternative data access rule configuration UI under the Security tab. The UI allows a simple way of defying access rules by checking and unchecking checkboxes.
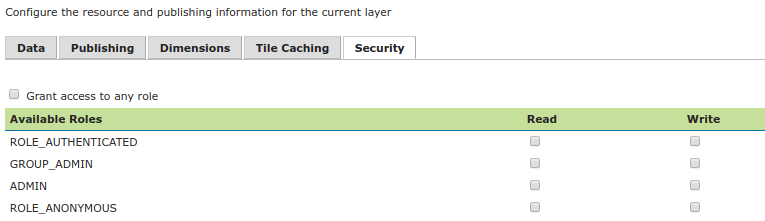
Since admin rules can be defined only at the workspace level, the Layer security tab doesn’t show the admin access mode, that indeed is available from the Security tab of the Workspace configuration page.
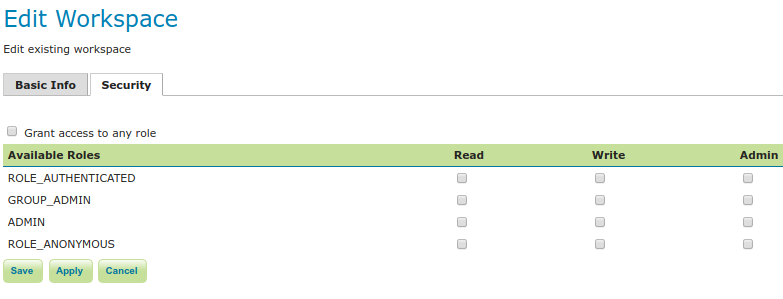
To create/edit workspace/layer/group data access rules simply check/uncheck checkboxes according to desired access mode and role.
The Grant access to any role checkbox grants each role for each access mode.
Only Data Access Rules can be configured by the Security tabs on the configuration pages. Catalog Mode still needs to be set in to the Data page of the security settings.