Tiled Layers configuration
A couple of tiled layers need to be configured in GeoServer, before getting involved with the OGC-API Tiles.
You might already have them, but just in case, here are the instructions to create them, if missing.
In case you have them, make sure to add the “WebMercatorQuad” gridset to the set of supported tile matrixes, and the vector tiles formats for topp:states.
Raster layer
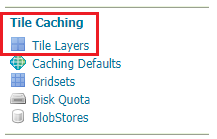
Once logged on GeoServer GUI as an admin, click on Tile Layers link from the Tile Caching section on the left menu.
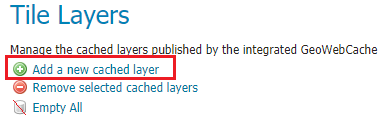
Then, click on Add a new cached layer link
From the list of selectable layers to be cached, check the box on the nurc:Img_Sample layer and then click on Configure selected layers with caching defaults link.

Click Ok on the confirmation message and then go back to the Tile Layers link from the Tile Caching section on the left menu.
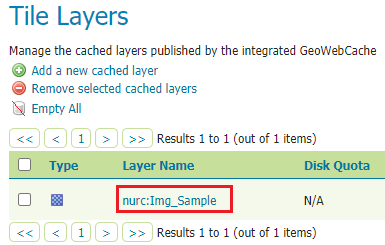
Click on nurc:Img_Sample from the list of available tiled layers to configure it.
From the layer configuration page, scroll at the very bottom of the page and add a grid subset, by selecting
WebMercatorQuad from the drop down list and click on the + icon when done, to add it.
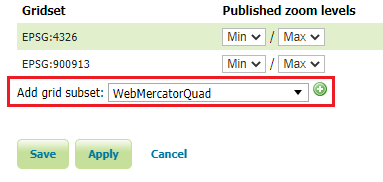
Finally, click on Save and the cached layer will been configured.
Vector layer
Repeat previous steps to configure a vector layer, this time selecting topp:states as tiled layer.
During the layer configuration, make sure to also select the application/json;type=geojson and application/vnd.mapbox-vector-tile from the Tile Image Formats list.
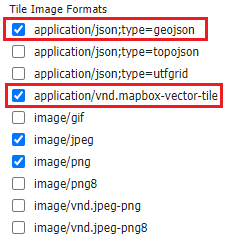
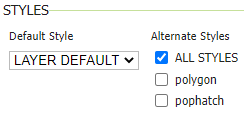
Also make sure that ALL STYLES is checked in Alternate Styles area of the STYLES section.