
Introduction To Processing With GDAL Utilities
In the Adding a GeoTiff section, a GeoTIFF file has been added to GeoServer as is. However, it’s a common practice to do a preliminary analysis on the available data and, if needed, optimize it since configuring big datasets without proper pre-processing, may result in low performance when accessing them. In this section, instructions about how to do data optimization will be provided by introducing some GDAL Utilities. The current version of GDAL libraries used for this training is 3.1.4, released 2020/10/20. GDAL Programs documentation:
Note
On a Windows machine you can set-up a shell with all GDAL Utilities, running directly the file OSGeo4W.bat under the %TRAINING_ROOT% folder.
A summary of the GDAL Utilities being introduced in this chapter:
- gdalinfo
- gdal_translate
- gdaladdo
- gdalwarp
- gdalbuildvrt
- gdal_rasterize
- gdal_merge.py
- gdal2tiles.py
- gdal_calc.py
- gdal_edit.py
gdalinfo
This utility allows to get several info from the GDAL library, for instance, specific Driver capabilities and input Datasets/Files properties.
gdalinfo - Getting Drivers Capabilities
Being GeoTIFF a widely adopted geospatial format, it’s useful to get information about the GDAL GeoTIFF’s Driver capabilities using the command:
gdalinfo --format GTIFF
This is only a trimmed down version of a typical output:
      Format Details:
  Short Name: GTiff
  Long Name: GeoTIFF
  Supports: Raster
  Extensions: tif tiff
  Mime Type: image/tiff
  Help Topic: drivers/raster/gtiff.html
  Supports: Subdatasets
  Supports: Open() - Open existing dataset.
  Supports: Create() - Create writable dataset.
  Supports: CreateCopy() - Create dataset by copying another.
  Supports: Virtual IO - eg. /vsimem/
  Creation Datatypes: Byte UInt16 Int16 UInt32 Int32 Float32 Float64 CInt16 CInt32 CFloat32 CFloat64

<CreationOptionList>
  <Option name="COMPRESS" type="string-select">
    <Value>NONE</Value>
    <Value>LZW</Value>
    <Value>PACKBITS</Value>
    <Value>JPEG</Value>
    <Value>CCITTRLE</Value>
    <Value>CCITTFAX3</Value>
    <Value>CCITTFAX4</Value>
    <Value>DEFLATE</Value>
  </Option>
  <Option name="PREDICTOR" type="int" description="Predictor Type (1=default, 2=horizontal differencing, 3=floating point prediction)" />
  <Option name="DISCARD_LSB" type="string" description="Number of least-significant bits to set to clear as a single value or comma-separated list of values for per-band values" />
  <Option name="JPEG_QUALITY" type="int" description="JPEG quality 1-100" default="75" />
  <Option name="JPEGTABLESMODE" type="int" description="Content of JPEGTABLES tag. 0=no JPEGTABLES tag, 1=Quantization tables only, 2=Huffman tables only, 3=Both" default="1" />
  <Option name="ZLEVEL" type="int" description="DEFLATE compression level 1-9" default="6" />
  <Option name="NUM_THREADS" type="string" description="Number of worker threads for compression. Can be set to ALL_CPUS" default="1" />
  <Option name="NBITS" type="int" description="BITS for sub-byte files (1-7), sub-uint16_t (9-15), sub-uint32_t (17-31), or float32 (16)" />
  <Option name="INTERLEAVE" type="string-select" default="PIXEL">
    <Value>BAND</Value>
    <Value>PIXEL</Value>
  </Option>
  <Option name="TILED" type="boolean" description="Switch to tiled format" />
  <Option name="TFW" type="boolean" description="Write out world file" />
  <Option name="RPB" type="boolean" description="Write out .RPB (RPC) file" />
  <Option name="RPCTXT" type="boolean" description="Write out _RPC.TXT file" />
  <Option name="BLOCKXSIZE" type="int" description="Tile Width" />
  <Option name="BLOCKYSIZE" type="int" description="Tile/Strip Height" />
  <Option name="PHOTOMETRIC" type="string-select">
    <Value>MINISBLACK</Value>
    <Value>MINISWHITE</Value>
    <Value>PALETTE</Value>
    <Value>RGB</Value>
    <Value>CMYK</Value>
    <Value>YCBCR</Value>
    <Value>CIELAB</Value>
    <Value>ICCLAB</Value>
    <Value>ITULAB</Value>
  </Option>
  <Option name="SPARSE_OK" type="boolean" description="Should empty blocks be omitted on disk?" default="FALSE" />
  <Option name="ALPHA" type="string-select" description="Mark first extrasample as being alpha">
    <Value>NON-PREMULTIPLIED</Value>
    <Value>PREMULTIPLIED</Value>
    <Value>UNSPECIFIED</Value>
    <Value aliasOf="NON-PREMULTIPLIED">YES</Value>
    <Value aliasOf="UNSPECIFIED">NO</Value>
  </Option>
  <Option name="PROFILE" type="string-select" default="GDALGeoTIFF">
    <Value>GDALGeoTIFF</Value>
    <Value>GeoTIFF</Value>
    <Value>BASELINE</Value>
  </Option>
  <Option name="PIXELTYPE" type="string-select">
    <Value>DEFAULT</Value>
    <Value>SIGNEDBYTE</Value>
  </Option>
  <Option name="BIGTIFF" type="string-select" description="Force creation of BigTIFF file">
    <Value>YES</Value>
    <Value>NO</Value>
    <Value>IF_NEEDED</Value>
    <Value>IF_SAFER</Value>
  </Option>
  <Option name="ENDIANNESS" type="string-select" default="NATIVE" description="Force endianness of created file. For DEBUG purpose mostly">
    <Value>NATIVE</Value>
    <Value>INVERTED</Value>
    <Value>LITTLE</Value>
    <Value>BIG</Value>
  </Option>
  <Option name="COPY_SRC_OVERVIEWS" type="boolean" default="NO" description="Force copy of overviews of source dataset (CreateCopy())" />
  <Option name="SOURCE_ICC_PROFILE" type="string" description="ICC profile" />
  <Option name="SOURCE_PRIMARIES_RED" type="string" description="x,y,1.0 (xyY) red chromaticity" />
  <Option name="SOURCE_PRIMARIES_GREEN" type="string" description="x,y,1.0 (xyY) green chromaticity" />
  <Option name="SOURCE_PRIMARIES_BLUE" type="string" description="x,y,1.0 (xyY) blue chromaticity" />
  <Option name="SOURCE_WHITEPOINT" type="string" description="x,y,1.0 (xyY) whitepoint" />
  <Option name="TIFFTAG_TRANSFERFUNCTION_RED" type="string" description="Transfer function for red" />
  <Option name="TIFFTAG_TRANSFERFUNCTION_GREEN" type="string" description="Transfer function for green" />
  <Option name="TIFFTAG_TRANSFERFUNCTION_BLUE" type="string" description="Transfer function for blue" />
  <Option name="TIFFTAG_TRANSFERRANGE_BLACK" type="string" description="Transfer range for black" />
  <Option name="TIFFTAG_TRANSFERRANGE_WHITE" type="string" description="Transfer range for white" />
  <Option name="STREAMABLE_OUTPUT" type="boolean" default="NO" description="Enforce a mode compatible with a streamable file" />
  <Option name="GEOTIFF_KEYS_FLAVOR" type="string-select" default="STANDARD" description="Which flavor of GeoTIFF keys must be used">
    <Value>STANDARD</Value>
    <Value>ESRI_PE</Value>
  </Option>
  <Option name="GEOTIFF_VERSION" type="string-select" default="AUTO" description="Which version of GeoTIFF must be used">
    <Value>AUTO</Value>
    <Value>1.0</Value>
    <Value>1.1</Value>
  </Option>
</CreationOptionList>

<OpenOptionList>
  <Option name="NUM_THREADS" type="string" description="Number of worker threads for compression. Can be set to ALL_CPUS" default="1" />
  <Option name="GEOTIFF_KEYS_FLAVOR" type="string-select" default="STANDARD" description="Which flavor of GeoTIFF keys must be used (for writing)">
    <Value>STANDARD</Value>
    <Value>ESRI_PE</Value>
  </Option>
  <Option name="GEOREF_SOURCES" type="string" description="Comma separated list made with values INTERNAL/TABFILE/WORLDFILE/PAM/NONE that describe the priority order for georeferencing" default="PAM,INTERNAL,TABFILE,WORLDFILE" />
  <Option name="SPARSE_OK" type="boolean" description="Should empty blocks be omitted on disk?" default="FALSE" />
</OpenOptionList>

  Other metadata items:
    LIBGEOTIFF=1700
    LIBTIFF=LIBTIFF, Version 4.3.0
Copyright (c) 1988-1996 Sam Leffler
Copyright (c) 1991-1996 Silicon Graphics, Inc.
- From the above list of create options it’s possible to determine the main GeoTIFF Driver’s writing capabilities:
- COMPRESS: customize the compression to be used when writing output data
- JPEG_QUALITY: specify a quality factor to be used by the JPEG compression
- TILED: When set to YES it allows to tile output data
- BLOCKXSIZE, BLOCKYZISE: Specify the Tile dimension width and Tile dimension height
- PHOTOMETRIC: Specify the photometric interpretation of the data
- PROFILE: Specify the GeoTIFF profile to be used (some profiles only support a minimal set of TIFF Tags while some others provide a wider range of Tags)
- BIGTIFF: Specify when to write data as BigTIFF (A TIFF format which allows to break the 4GB Offset boundary)
gdalinfo - Getting Dataset/File Properties
The following instructions allow you to get information about the sample dataset previously configured in GeoServer.
Run:
* Linux::

  cd ${TRAINING_ROOT}/data/user_data/aerial

  gdalinfo 13tde815295_200803_0x6000m_cl.tif

* Windows::

  cd %TRAINING_ROOT%\data\user_data\aerial\

  gdalinfo 13tde815295_200803_0x6000m_cl.tif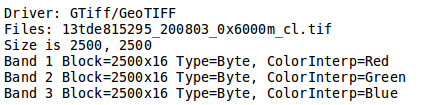
Part of the gdalinfo output on a sample dataset
Check the Block info as well as the Overviews info if present.
- Block: It represents the internal tiling. Notice that the sample dataset has tiles made of 16 rows having width equals to the full image width.
- Overviews: It provides information about the underlying overviews. Notice that the sample dataset doesn’t have overviews since the Overviews property is totally missing from the gdalinfo output.
gdalinfo - parameters
- Where the meaning of the main parameters is summarized below:
- -json: output in JSON format
- -stats: read (or compute) and display statistics about the image
- -hist: display histogram information for all bands
- Information obtained by this command are:
- driver to access the source of the image
- size in pixels and lines
- CRS in OGC WKT
- GeoTransform associated with the file
- Corner Coordinates in georeferenced, and if possible lat/long based on the full geotransform
- GCP
- Metadata
- Bands:
- Data Types
- Color interpretations
- Block size
- min/max values
- NODATA value
- Overview resolutions available
gdal_translate
This utility allows to convert a dataset to a different format by allowing a wide set of parameters to customize the conversion.
Running the command:
gdal_translate
allows to get the list of supported parameters as well as the supported output formats:
Usage: gdal_translate [--help-general]
[-ot {Byte/Int16/UInt16/UInt32/Int32/Float32/Float64/
        CInt16/CInt32/CFloat32/CFloat64}] [-strict]
[-if format]* [-of format]
[-b band]* [-mask band] [-expand {gray|rgb|rgba}]
[-outsize xsize[%]|0 ysize[%]|0] [-tr xres yres]
[-r {nearest,bilinear,cubic,cubicspline,lanczos,average,rms,mode}]
[-unscale] [-scale[_bn] [src_min src_max [dst_min dst_max]]]* [-exponent[_bn] exp_val]*
[-srcwin xoff yoff xsize ysize] [-epo] [-eco]
[-projwin ulx uly lrx lry] [-projwin_srs srs_def]
[-a_srs srs_def] [-a_coord_epoch <epoch>]
[-a_ullr ulx uly lrx lry] [-a_nodata value]
[-a_scale value] [-a_offset value]
[-nogcp] [-gcp pixel line easting northing [elevation]]*
|-colorinterp{_bn} {red|green|blue|alpha|gray|undefined}]
|-colorinterp {red|green|blue|alpha|gray|undefined},...]
[-mo "META-TAG=VALUE"]* [-q] [-sds]
[-co "NAME=VALUE"]* [-stats] [-norat] [-noxmp]
[-oo NAME=VALUE]*
src_dataset dst_dataset
- Where the meaning of the main parameters is summarized below:
- -ot: allows to specify the output datatype (Make sure that the specified datatype is contained in the Creation Datatypes list of the Writing driver)
- -if: specify the driver to use to open the input source. Generally we dont use it because it is automatically detected. But sometimes we can use it to force an incorrect detection of the format.
- -of: specify the desired output format (GTIFF is the default value)
- -strict: Don’t be forgiving of mismatches and lost data when translating to the output format.
- -b: allows to specify an input band to be written in the output file. (Use multiple -b option to specify more bands)
- -r: resampling method:
- nearest: applies a nearest neighbour resampler
- average: computes the average of all non-NODATA contributing pixels
- bilinear: applies a bilinear convolution kernel
- cubic: applies a cubic convolution kernel
- cubicspline: applies a B-Spline convolution kernel
- lanczos: applies a Lanczos windowed sinc convolution kernel
- mode: selects the value which appears most often of all the sampled points
- -mask: allows to specify an input band to be write an output dataset mask band.
- -expand: allows to expose a dataset with 1 band with a color table as a dataset with 3 (rgb) or 4 (rgba) bands. The (gray) value allows to expand a dataset with a color table containing only gray levels to a gray indexed dataset.
- -outsize: allows to set the size of the output file in terms of pixels and lines unless the % sign is attached in which case it’s as a fraction of the input image size.
- -unscale: allows to apply the scale/offset metadata for the bands to convert from scaled values to unscaled ones.
- -scale: allows to rescale the input pixels values from the range src_min to src_max to the range dst_min to dst_max. (If omitted the output range is 0 to 255. If omitted the input range is automatically computed from the source data).
- -srcwin: allows to select a subwindow from the source image in terms of xoffset, yoffset, width and height
- -projwin: allows to select a subwindow from the source image by specifying the corners given in georeferenced coordinates (expressed using the SRS of the dataset or the SRS defined with the option -projwin_srs).
- -projwin_srs: Specifies the SRS to use with the coordinates given with the -projwin option
- -a_srs: allows to override the projection for the output file. The srs_def may be any of the usual GDAL/OGR forms, complete WKT, PROJ.4, EPSG:n or a file containing the WKT.
- -a_ullr: allows to assign/override the georeferenced bounds of the output file.
- -a_nodata: allows to assign a specified nodata value to output bands.
- -gcp: Add the indicated ground control point(<pixel> <line> <easting> <northing>) to the destination dataset. This option may be provided multiple times
- -colorinterp: Override the color interpretation of all specified bands. For example -colorinterp red,green,blue,alpha to define a 4 band output dataset
- -co: allows to set a creation option in the form “NAME=VALUE” to the output format driver. (Multiple -co options may be listed)
- -mo: allows to set metadata key/value on the output dataset.
- -stats: allows to get statistics (min, max, mean, stdDev) for each band
- src_dataset: is the source dataset name. It can be either file name, URL of data source or subdataset name for multi*-dataset files
- dst_dataset: is the destination file name.
gdal_translate - Tiling the sample dataset
The following steps provide instructions to tile the sample dataset previously configured in GeoServer, by using the GeoTiff driver.
- Create a directory to store the converted data:
Linux:
cd $TRAINING_ROOT/data/user_data

mkdir retiled
Windows:
cd %TRAINING_ROOT%\data\user_data

mkdir retiled
- Convert the input sample data to an output file having tiling set to 512x512 (the compression parameters are explained in ). Run:
Linux:
gdal_translate -co "TILED=YES" -co "BLOCKXSIZE=512" -co "BLOCKYSIZE=512" -co "COMPRESS=JPEG" -co "PHOTOMETRIC=YCBCR" -co "QUALITY=85" aerial/13tde815295_200803_0x6000m_cl.tif retiled/13tde815295_200803_0x6000m_cl.tifWindows:
gdal_translate -co "TILED=YES" -co "BLOCKXSIZE=512" -co "BLOCKYSIZE=512" -co "COMPRESS=JPEG" -co "PHOTOMETRIC=YCBCR" -co "QUALITY=85" aerial\13tde815295_200803_0x6000m_cl.tif retiled\13tde815295_200803_0x6000m_cl.tif
- Optionally, check that the output dataset has successfully been tiled, by running the command:
Linux:
gdalinfo retiled/13tde815295_200803_0x6000m_cl.tifWindows:
gdalinfo retiled\13tde815295_200803_0x6000m_cl.tif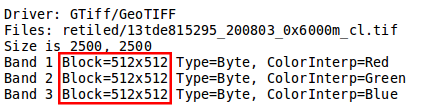
Part of the gdalinfo output on the tiled dataset. Notice the Block value now is 512x512
gdaladdo
This utility allows to add overviews to a dataset. The following steps provide instructions to add overviews to the tiled sample dataset.
Running the command:
gdaladdo
allows to get the list of supported parameters:
Usage: gdaladdo [-r {nearest,average,gauss,cubic,cubicspline,lanczos,average_mp,average_magphase,mode}]
                [-ro] [-clean] [-q] [-oo NAME=VALUE]* [-minsize val]
                [--help-general] filename [levels]
- Where the meaning of the main parameters is summarized below:
- -r: choice of resampling method (default: nearest)
- -ro: open the dataset in read-only mode, in order to generate external overview (for GeoTIFF datasets especially)
- filename: remove all overviews
- levels: allows to specify a list of overview levels to build.
- -clean: remove all overviews
- -q: turn off progress display
- -b: band to create overview (if not set overviews will be created for all bands)
- There are also few useful configuration variables available:
- -\-config USE_RRD YES : Use Erdas Imagine format (.aux) as overview format.
- Below, only for external overviews in GeoTIFF format:
- -\-config COMPRESS_OVERVIEW {JPEG,LZW,PACKBITS,DEFLATE} : TIFF compression
- -\-config PHOTOMETRIC_OVERVIEW {RGB,YCBCR,...} : TIFF photometric interp.
- -\-config INTERLEAVE_OVERVIEW {PIXEL|BAND} : TIFF interleaving method
- -\-config BIGTIFF_OVERVIEW {IF_NEEDED|IF_SAFER|YES|NO} : is BigTIFF used
gdaladdo - Adding overviews to the sample dataset
- Run:
Linux:
cd $TRAINING_ROOT/data/user_data/retiled

gdaladdo -r average --config JPEG_QUALITY_OVERVIEW 85 13tde815295_200803_0x6000m_cl.tif 2 4 8 16 32
Windows:
cd %TRAINING_ROOT%\data\user_data\retiled

gdaladdo -r average --config JPEG_QUALITY_OVERVIEW 85 13tde815295_200803_0x6000m_cl.tif 2 4 8 16 32
to add 5 levels of overviews having 2,4,8,16,32 subsampling factors applied to the original image resolution respectively.
Optionally, check that the overviews have been added to the dataset, by running the command:
gdalinfo 13tde815295_200803_0x6000m_cl.tif
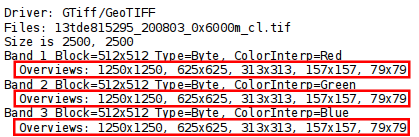
Part of the gdalinfo output on the tiled dataset with overviews. Notice the Overviews properties
Process in bulk
Instead of manually repeating these 2 steps (retile + add overviews) for each file, we can invoke a few commands to get it automated.
- Run:
Linux:
cd $TRAINING_ROOT/data/user_data

mkdir optimized

cd aerial

for i in `find *.tif`; do gdal_translate -CO "TILED=YES" -CO "BLOCKXSIZE=512" -CO "BLOCKYSIZE=512" -co "COMPRESS=JPEG" -co "PHOTOMETRIC=YCBCR" $i ../optimized/$i; gdaladdo -r average --config JPEG_QUALITY_OVERVIEW 85 ../optimized/$i 2 4 8 16 32; done
Windows:
cd %TRAINING_ROOT%\data\user_data\

mkdir optimized

cd aerial

notepad optimize.bat
will be open a text editor. Copy the following content:
for %%F in (*.tif) do  (
      echo Processing file %%F

      REM translate
      echo Performing gdal_translate on file %%F to file %%~nF.tiff
      gdal_translate -co "TILED=YES" -co "BLOCKXSIZE=512" -co "BLOCKYSIZE=512" -co "COMPRESS=JPEG" -co "PHOTOMETRIC=YCBCR" %%F ..\optimized\%%~nF.tiff

      REM add overviews
      echo Adding overviews on file %%~nF.tiff
      gdaladdo -r average --config JPEG_QUALITY_OVERVIEW 85 ..\optimized\%%~nF.tiff 2 4 8 16 32

)
Then save the file and run the created .bat file:
optimize.bat
You should see a list of run like this:
...
Processing file 13tde815310_200803_0x6000m_cl.tif
Performing gdal_translate on file 13tde815310_200803_0x6000m_cl.tif to file 13tde815310_200803_0x6000m_cl.tiff
Input file size is 2500, 2500
0...10...20...30...40...50...60...70...80...90...100 - done.
Adding overviews on file 13tde815310_200803_0x6000m_cl.tiff
0...10...20...30...40...50...60...70...80...90...100 - done.
...
Warning
This process can take some seconds.
At this point optimized datasets have been prepared and they are ready to be served by GeoServer as an ImageMosaic.
gdalwarp
This utility allows to warp and reproject a dataset. The following steps provide instructions to reproject the aerial dataset (which has “EPSG:26913” coordinate reference system) to WGS84 (“EPSG:4326”).
Running the command:
gdalwarp
allows to get the list of supported parameters:
Usage:
 gdalwarp [--help-general] [--formats]
 [-s_srs srs_def] [-t_srs srs_def] [-to "NAME=VALUE"]* [-novshiftgrid]
 [-order n | -tps | -rpc | -geoloc] [-et err_threshold]
 [-refine_gcps tolerance [minimum_gcps]]
 [-te xmin ymin xmax ymax] [-tr xres yres] [-tap] [-ts width height]
 [-ovr level|AUTO|AUTO-n|NONE] [-wo "NAME=VALUE"] [-ot Byte/Int16/...] [-wt Byte/Int16]
 [-srcnodata "value [value...]"] [-dstnodata "value [value...]"] -dstalpha
 [-r resampling_method] [-wm memory_in_mb] [-multi] [-q]
 [-cutline datasource] [-cl layer] [-cwhere expression]
 [-csql statement] [-cblend dist_in_pixels] [-crop_to_cutline]
 [-if format]* [-of format] [-co "NAME=VALUE"]* [-overwrite]
 [-nomd] [-cvmd meta_conflict_value] [-setci] [-oo NAME=VALUE]*
 [-doo NAME=VALUE]*
 srcfile* dstfile
- Available resampling methods are * near (default), bilinear, cubic, cubicspline, lanczos, average, rms,
- mode, max, min, med, Q1, Q3, sum *
- Where the meaning of the main parameters is summarized below:
- -s_srs: allows to specify the source coordinate reference system (default is CRS from the input dataset)
- -t_srs: allows to specify the target coordinate reference system
- -te: allows to set georeferenced extents (expressed in target CRS) of the output
- -tr: allows to specify the output resolution (expressed in target georeferenced units)
- -ts: allows to specify the output size in pixel and lines.
- -r: allows to specify the resampling method (one of near, bilinear, cubic, cubicspline and lanczos)
- -srcnodata: allows to specify band values to be excluded from interpolation.
- -dstnodata: allows to specify nodata values on output file.
- -wm: allows to specify the amount of memory (expressed in megabytes) used by the warping API for caching.
gdalwarp - Reprojecting sample dataset to WGS84
- Run:
Linux:
cd $TRAINING_ROOT/data/user_data/retiled

gdalwarp -t_srs "EPSG:4326" -co "TILED=YES" 13tde815295_200803_0x6000m_cl.tif 13tde815295_200803_0x6000m_cl_warped.tif
Windows:
cd %TRAINING_ROOT%/data/user_data/retiled

gdalwarp -t_srs "EPSG:4326" -co "TILED=YES" 13tde815295_200803_0x6000m_cl.tif 13tde815295_200803_0x6000m_cl_warped.tif
to reproject the specified aerial dataset to WGS84 coordinate reference system.
Optionally, check that reprojection has been successfull, by running the command:
gdalinfo 13tde815295_200803_0x6000m_cl_warped.tif
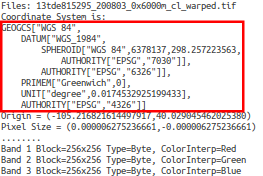
Part of the gdalinfo output on the warped dataset. Notice the updated Coordinate System property
gdalbuildvrt
This utility allows to mosaic set of images together, given the fact that all images belongs to same coordinates system and matching number of bands. Images might be overlapping, in that case last image will be copied over earlier one.
Running the command:
gdalbuildvrt
allows to get the list of supported parameters:
Usage:
  gdalbuildvrt [-tileindex field_name]
               [-resolution {highest|lowest|average|user}]
               [-te xmin ymin xmax ymax] [-tr xres yres] [-tap]
               [-separate] [-b band] [-sd subdataset]
               [-allow_projection_difference] [-q]
               [-addalpha] [-hidenodata]
               [-srcnodata "value [value...]"] [-vrtnodata "value [value...]"]
               [-ignore_srcmaskband]
               [-a_srs srs_def]
               [-r {nearest,bilinear,cubic,cubicspline,lanczos,average,mode}]
               [-oo NAME=VALUE]*
               [-input_file_list my_list.txt] [-overwrite] output.vrt [gdalfile]*
- Where the meaning of the main parameters is summarized below:
- -tileindex: allows to specify value as the tile index field, instead of the default value which is ‘location’.
- -resolution {highest|lowest|average|user}: allows to specify resolution of all input files if they are not same, the -resolution flag enables the user to control the way the output resolution is computed. highest will pick the smallest values of pixel dimensions within the set of source rasters. lowest will pick the largest values of pixel dimensions within the set of source rasters. average is the default and will compute an average of pixel dimensions within the set of source rasters. user must be used in combination with the -tr (to set target resolution) option to specify the target resolution.
- -te xmin ymin xmax ymax: this allows user to set extent of VRT file
- -addalpha : this allows user to add alpha mask band to the VRT when the source raster have none
- -b :Using this option user can select an input <band> to be processed. Bands are numbered from 1. If input bands not set all bands will be added to vrt
- -sd :This allows user to select subdataset number (starting from 1) If exists in input dataset
- -a_srs :This allows users Override the projection for the output file.
- -r {nearest (default),bilinear,cubic,cubicspline,lanczos,average,mode} : This allows users to select a resampling algorithm.
- -input_file_list :To specify a text file with an input filename on each line
- -q : This disable the progress bar on the console
- -overwrite : allowes user to overwrite VRT if already exists
gdalbuildvrt - Building a VRT from a list of sample dataset
- Run:
Linux:
cd $TRAINING_ROOT/data/user_data

gdalbuildvrt aerial_index.vrt aerial/*.tif
 0...10...20...30...40...50...60...70...80...90...100 - done.
Windows:
cd %TRAINING_ROOT%\\data\\user_data

gdalbuildvrt aerial_index.vrt aerial/*.tif
 0...10...20...30...40...50...60...70...80...90...100 - done.
Warning
This process can take some seconds.
This will create aerial_index.vrt file in the user_data folder
gdal_rasterize
This utility allows burns vector geometries into a raster.
Running the command:
gdal_rasterize
allows to get the list of supported parameters:
 Usage:
   gdal_rasterize [-b band]* [-i] [-at]
{[-burn value]* | [-a attribute_name] | [-3d]} [-add]
[-l layername]* [-where expression] [-sql select_statement]
[-dialect dialect] [-of format] [-a_srs srs_def] [-to NAME=VALUE]*
[-co "NAME=VALUE"]* [-a_nodata value] [-init value]*
[-te xmin ymin xmax ymax] [-tr xres yres] [-tap] [-ts width height]
[-ot {Byte/Int16/UInt16/UInt32/Int32/Float32/Float64/
        CInt16/CInt32/CFloat32/CFloat64}]
[-optim {[AUTO]/VECTOR/RASTER}] [-q]
<src_datasource> <dst_filename>
- Where the meaning of the main parameters is summarized below:
- -b: allows to select band(s) to burn values into. user can pass mutiple -b depending upon number of bands of image
- -burn: allows to select a value to burn into a band for all objects. user can pass mutiple -burn depending upon number of bands of image
- -l: Use this to select the layer(s) from the datasource that will be used for input features.
- -a_srs :This allows users Override the projection for the output file.
- -tr xres yres : This allows user to set resolution
- -te xmin ymin xmax ymax: this allows user to set extent.
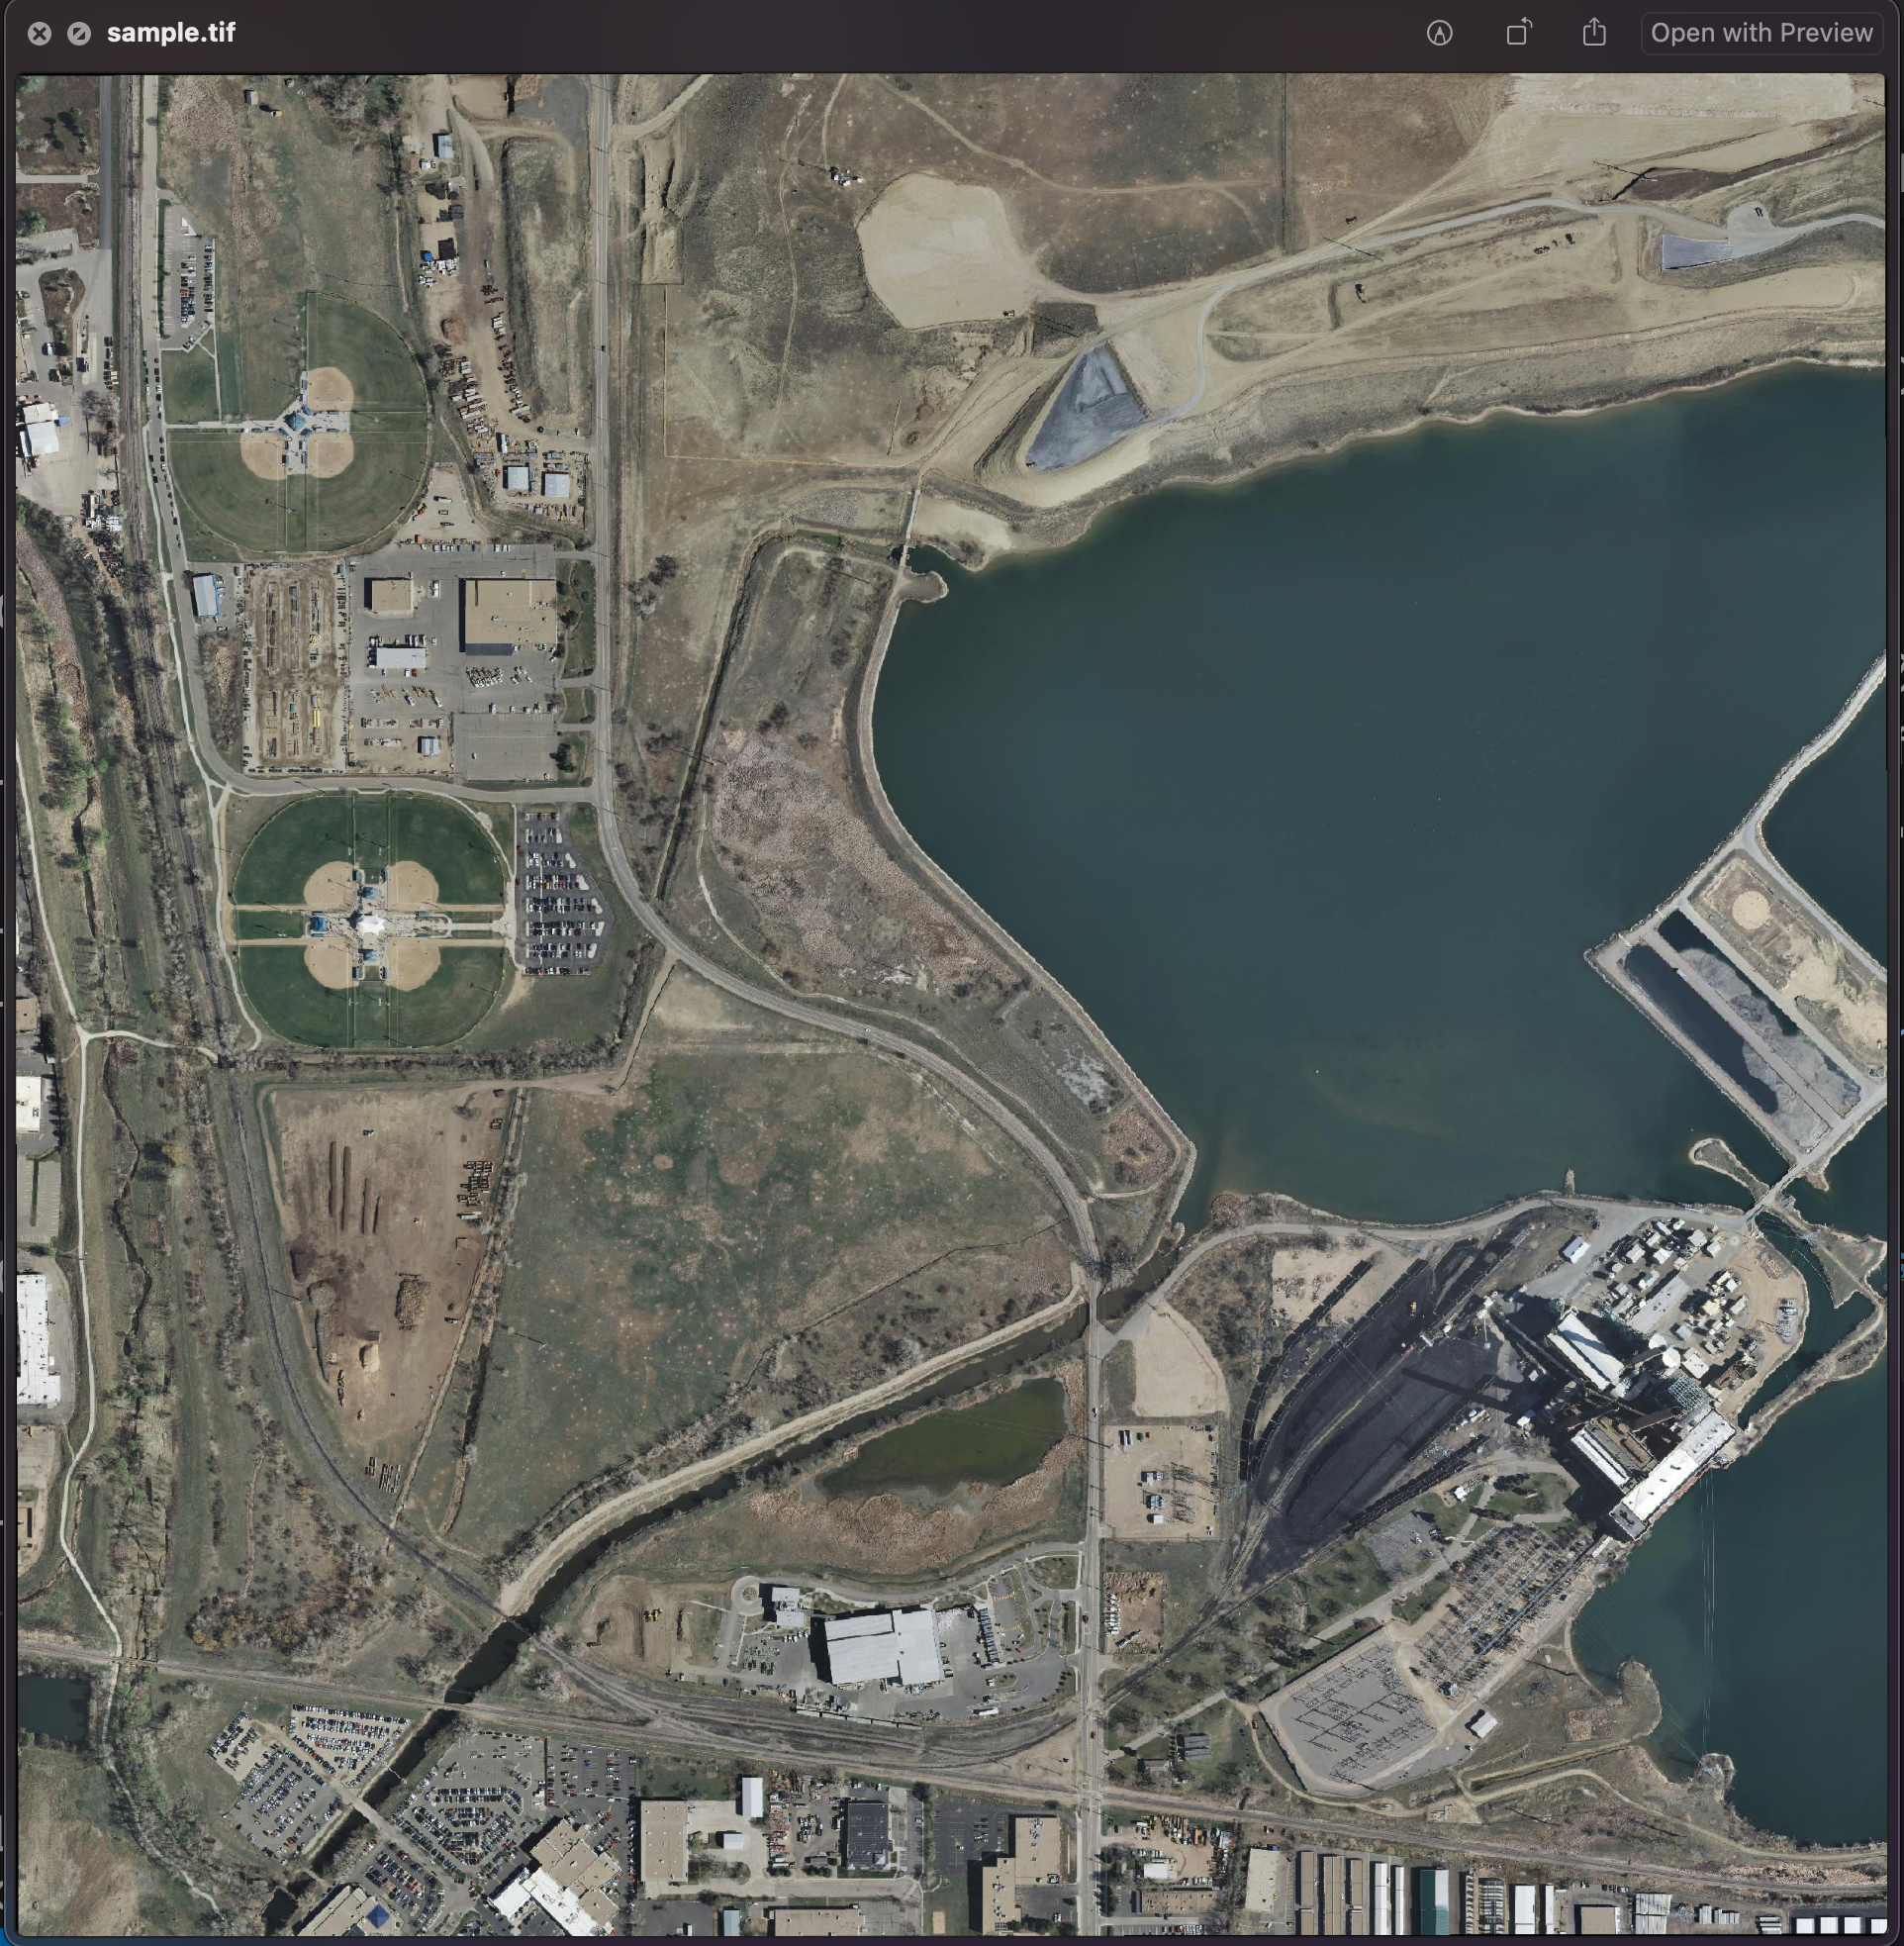
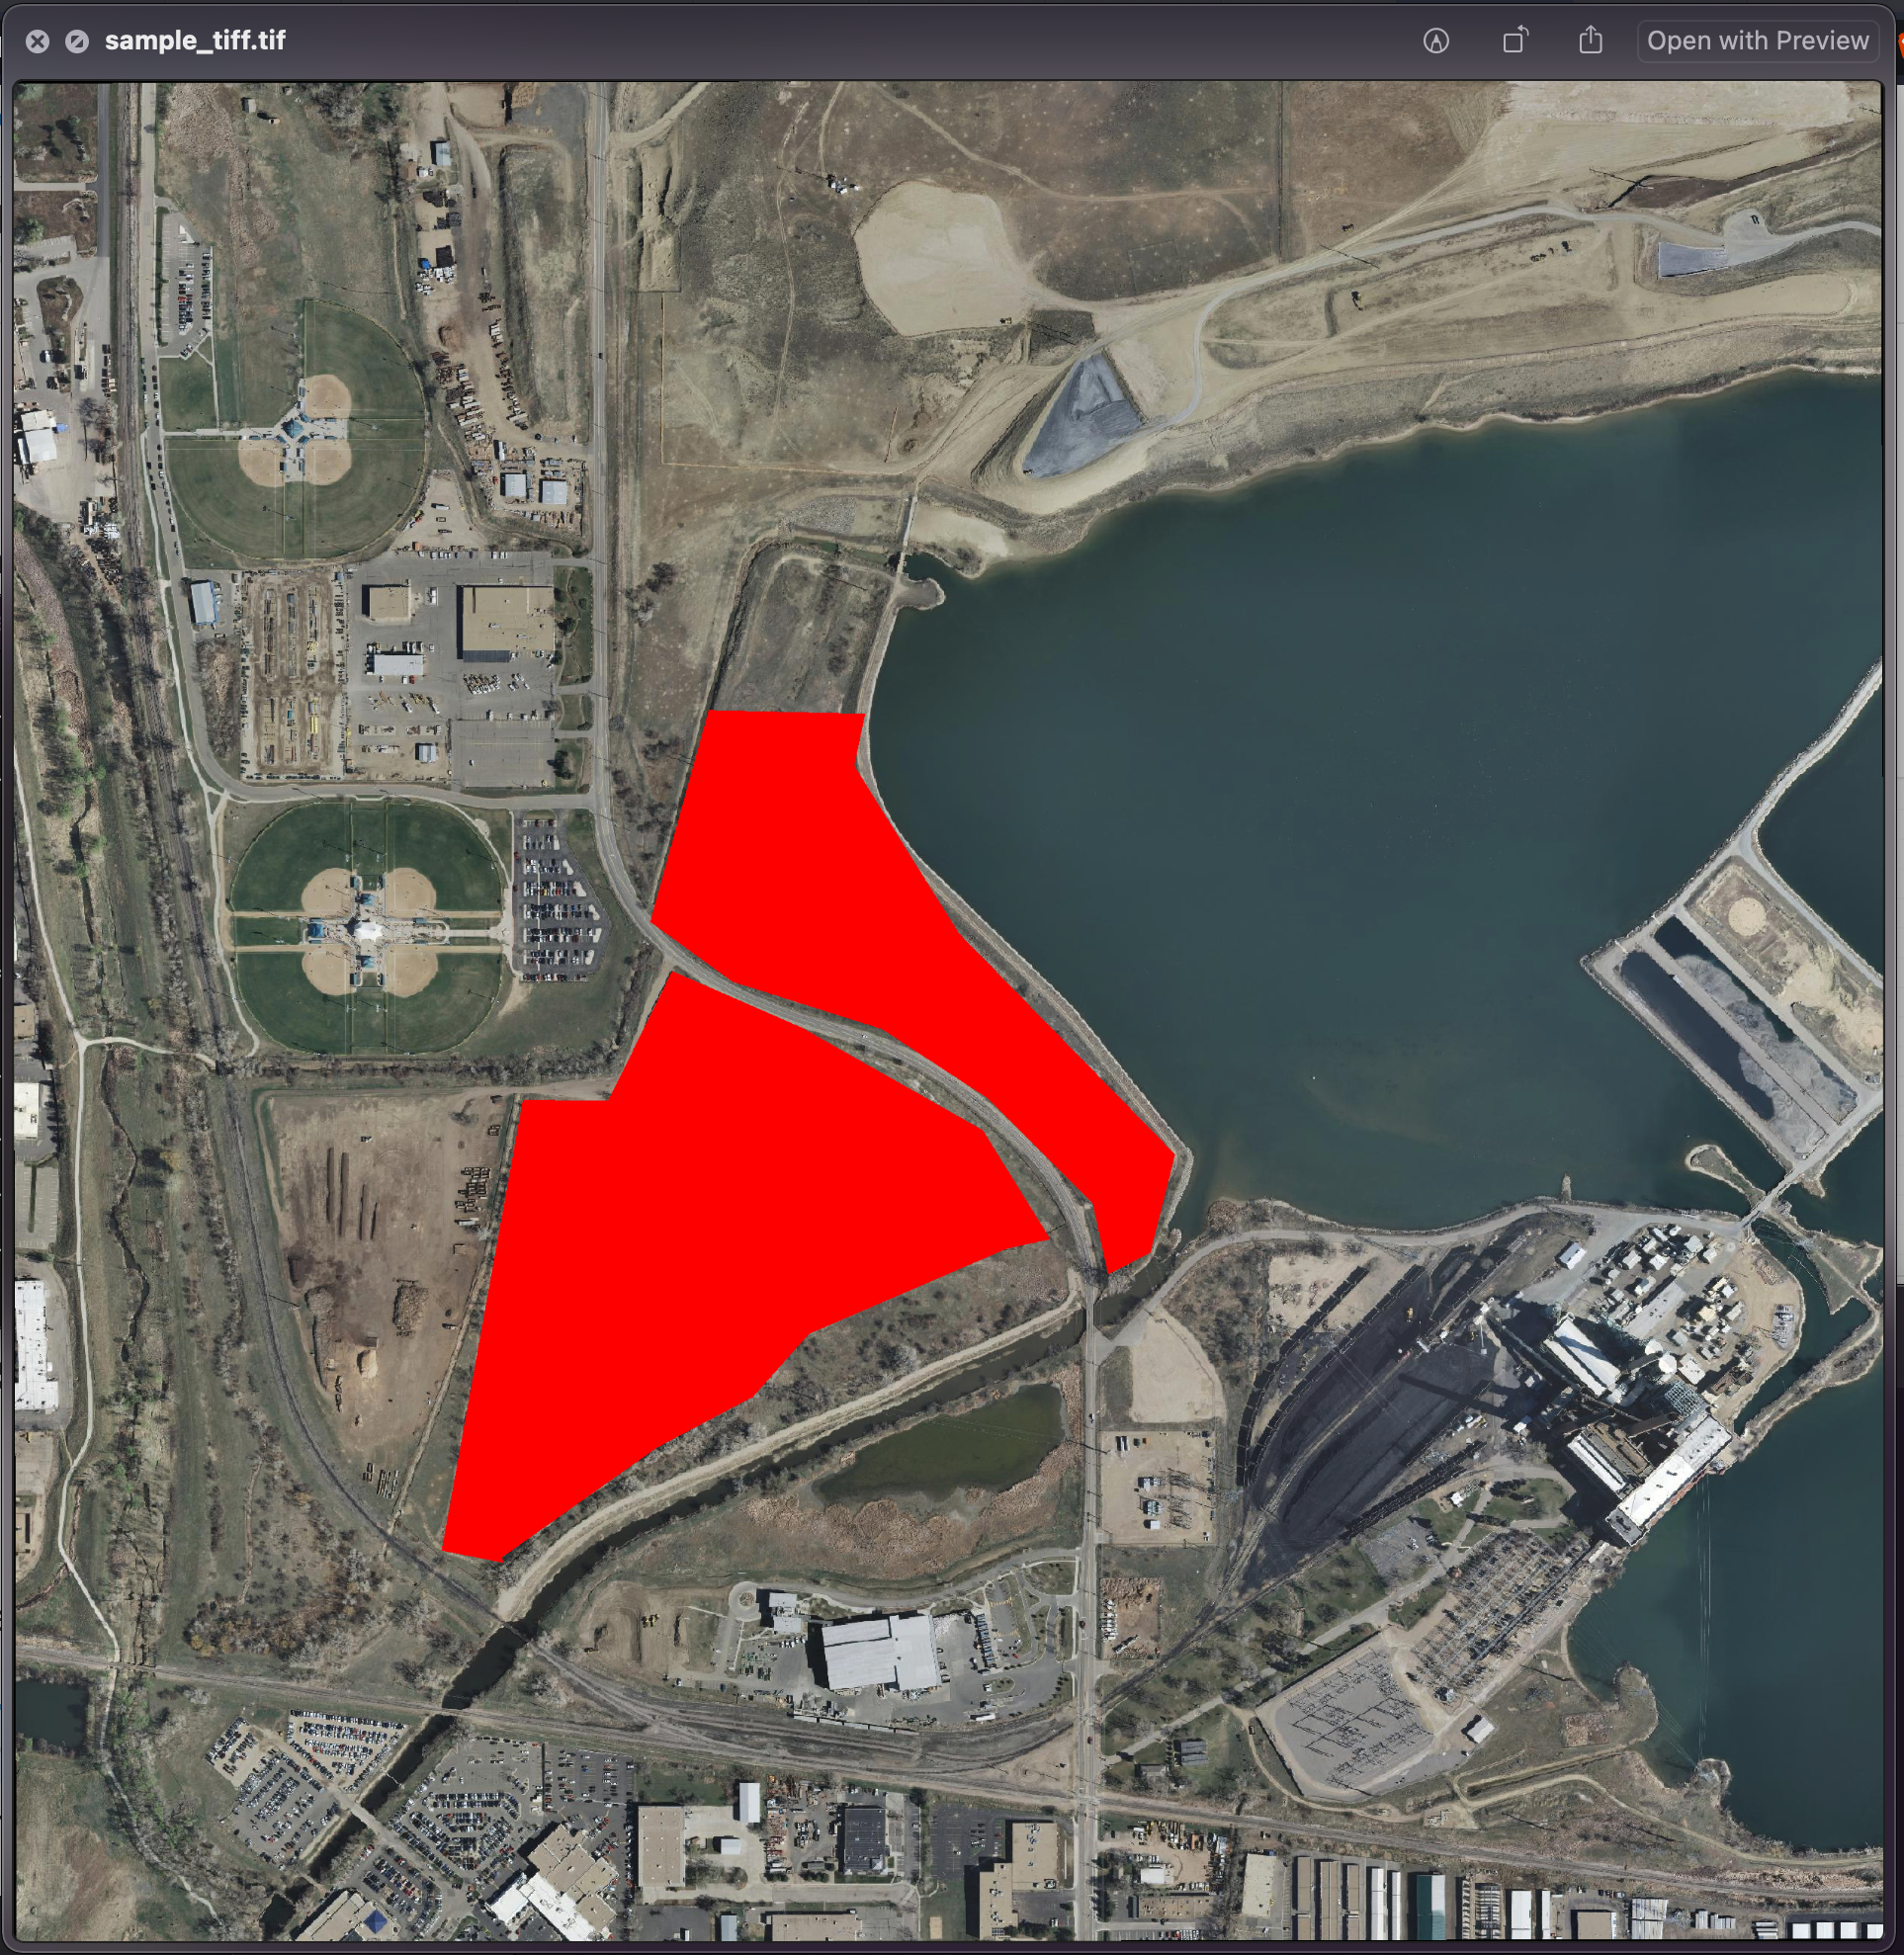
gdal_rasterize - Burning vector geometries into a raster.
- Run:
Linux:
cd $TRAINING_ROOT/data/user_data/gdal_processing_data/gdalrasterize

gdal_rasterize -b 1 -b 2 -b 3 -burn 255 -burn 0 -burn 0 -l mask mask.shp sample_tiff.tif
 0...10...20...30...40...50...60...70...80...90...100 - done.
Windows:
cd %TRAINING_ROOT%\\data\\user_data\\gdal_processing_data\\gdalrasterize

 gdal_rasterize -b 1 -b 2 -b 3 -burn 255 -burn 0 -burn 0 -l mask mask.shp sample_tiff.tif
 0...10...20...30...40...50...60...70...80...90...100 - done.
Warning
This process can take some seconds.
This will create sample_tiff.tif file with burned geometry with given band values
gdal also has python files created for specific operations. e.g. gdal_merge.py,gdal2tiles.py, etc. In order to use these files, user must have python environment setup done.
gdal_merge.py
This utility allows to create mosaic of multiple tifs.
Running the command:
gdal_merge.py
allows to get the list of supported parameters:
Usage: gdal_merge.py [-o out_filename] [-of out_format] [-co NAME=VALUE]*
 [-ps pixelsize_x pixelsize_y] [-tap] [-separate] [-q] [-v] [-pct]
 [-ul_lr ulx uly lrx lry] [-init "value [value...]"]
 [-n nodata_value] [-a_nodata output_nodata_value]
 [-ot datatype] [-cr
- Where the meaning of the main parameters is summarized below:
- -o: allows to specify name of output file
- -of: allows to select format of output file
- -a_nodata :This allows users to assign a specified nodata value to output bands.
- -tr xres yres : This allows user to set resolution
- -ul_lr xmin ymin xmax ymax: this allows user to set extent of output file.
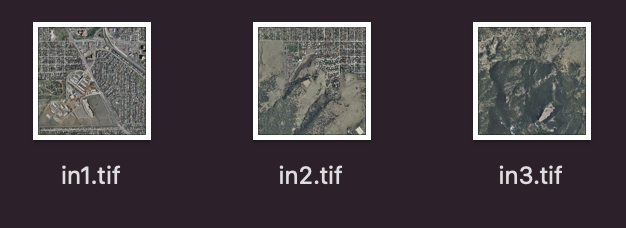
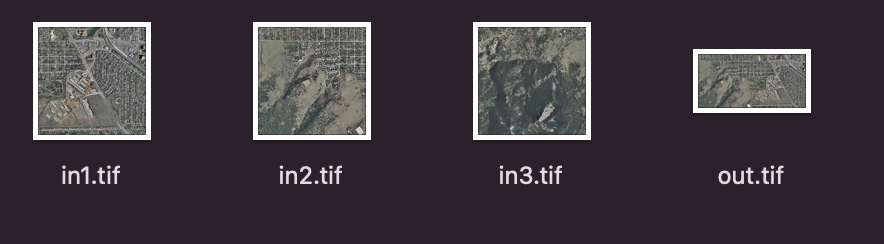
gdal_merge.py - Moasaicing multiple rasters together
- Run:
Linux:
cd $TRAINING_ROOT/data/user_data/gdal_processing_data/gdalmerge

gdal_merge.py -init 255 -o out.tif in1.tif in2.tif in3.tif
 0...10...20...30...40...50...60...70...80...90...100 - done.
Windows:
cd %TRAINING_ROOT%\\data\\user_data\\gdal_processing_data\\gdalmerge

 gdal_merge -init 255 -o out.tif in1.tif in2.tif in3.tif
 0...10...20...30...40...50...60...70...80...90...100 - done.
This will create out.tif file by combining all tiffs
gdal2tiles.py
This utility allows user to generate directory with TMS tiles, KMLs and simple web viewers.
Running the command:
gdal2tiles.py
allows to get the list of supported parameters:
Usage: gdal2tiles.py [-p profile] [-r resampling] [-s srs] [-z zoom]
 [-e] [-a nodata] [-v] [-q] [-h] [-k] [-n] [-u url]
 [-w webviewer] [-t title] [-c copyright]
 [--processes=NB_PROCESSES] [--xyz]
 --tilesize=PIXELS
 [-g googlekey] [-b bingkey] input_file [output_dir] [COMMON_OPTIONS]
- Where the meaning of the main parameters is summarized below:
- -xyz: This parameter allows users to generate XYZ tiles (OSM Slippy Map standard) instead of TMS. In the default mode (TMS), tiles at y=0 are the southern-most tiles, whereas in XYZ mode (used by OGC WMTS too), tiles at y=0 are the northern-most tiles.
- -z: allows user to select zoom level ranges. e.g. ‘3-6’
- -\-processes : allows given number of processes run parallel, to speed-up the computation.
- -k : This allows user to generate KML
- -w: This allows user to generate web viewer for all, google, openlayers, leaflet, mapml, none map clients
gdal2tiles.py - splitting rasters into TMS tiles
- Run:
Linux:
cd $TRAINING_ROOT/data/user_data/gdal_processing_data/gdal2tiles

gdal2tiles.py --zoom=2-5 sample.tif output
 Generating Base Tiles:
 0...10...20...30...40...50...60...70...80...90...100
 Generating Overview Tiles:
 0...10...20...30...40...50...60...70...80...90...100
Windows:
cd %TRAINING_ROOT%\\data\\user_data\\gdal_processing_data\\gdal2tiles

 gdal2tiles --zoom=2-5 sample.tif output
 Generating Base Tiles:
 0...10...20...30...40...50...60...70...80...90...100
 Generating Overview Tiles:
 0...10...20...30...40...50...60...70...80...90...100
This will create multiple folders and files in output folder for different zoom levels,.html files, etc.
gdal_calc.py
This utility allows user to do numpy calculation on command line for raster data
Running the command:
gdal_calc.py
allows to get the list of supported parameters:
Usage: gdal_calc.py --calc=expression --outfile=out_filename [-A filename]
        [--A_band=n] [-B...-Z filename] [other_options]
- Where the meaning of the main parameters is summarized below:
- -\-calc: This parameter allows users to add numpy functions and calculations usong +,-,*,/,%, etc.
- -z: allows user to select zoom level ranges. e.g. ‘3-6’
- -A : allows users to add files with tag A-Z and a-z
- -\-outfile : allows users to generate output file
gdal_calc.py - Numpy Calculations in Command line
- Run:
Linux:
cd $TRAINING_ROOT/data/user_data/gdal_processing_data/gdalcalc

gdal_calc.py -A band1.tif  -B band2.tif  --outfile=outf.tif --calc="A+B"
 0.. 0.... 1.. 1.. ... 99.. 99.. 99.. 99.. 100 - Done
Windows:
cd %TRAINING_ROOT%\\data\\user_data\\gdal_processing_data\\gdalcalc

gdal_calc -A band1.tif  -B band2.tif  --outfile=outf.tif --calc="A+B"
 0.. 0.... 1.. 1.. ... 99.. 99.. 99.. 99.. 100 - Done - Done
This will create outf.tif file based on addition of pixel values of both tiles
gdal_edit.py
This utility allows user to edit in place various information of an existing GDAL dataset. It only works with raster formats that support update access. Moreover, depending on the format, older values of the updated information might still be found in the file in a ghost state.
Running the command:
gdal_edit.py
allows to get the list of supported parameters:
Usage: gdal_edit [--help-general] [-ro] [-a_srs srs_def]
  [-a_ullr ulx uly lrx lry] [-a_ulurll ulx uly urx ury llx lly]
  [-tr xres yres] [-unsetgt] [-unsetrpc] [-a_nodata value] [-unsetnodata]
  [-offset value] [-scale value] [-units value]
  [-colorinterp_X red|green|blue|alpha|gray|undefined]*
  [-unsetstats] [-stats] [-approx_stats]
  [-setstats min max mean stddev]
  [-gcp pixel line easting northing [elevation]]*
  [-unsetmd] [-oo NAME=VALUE]* [-mo "META-TAG=VALUE"]*  datasetname
- Where the meaning of the main parameters is summarized below:
- -a_srs: allows to define the coordinate system that will be written to the dataset.
- -a_ullr: allows to assign/override the georeferenced bounds of the dataset.
- -a_ulurll: allows to assign/override the georeferenced bounds of the dataset. (This version is dedicate to rotated datasets)
- -tr: allows to set target resolution in georeferenced units (values must be positive).
- -unsetgt : remove the georeferencing information.
- -stats : allows to calculate and store band statistics.
- -a_nodata : assing a specific nodata value.
- -mo: allows to set metadata key/value on the dataset.
- gdal_edit.py allows to set some information to the dataset without the need of an actual pixel rewrite. It might be useful for example:
- to assign a coordinate reference system and a bounding box to a GeoTIFF which is missing the georeferencing.
- to assign a nodata value.
In the next section, instructions to configure an ImageMosaic will be provided.