
Advanced Mosaics and Pyramids Configuration
In this section you will learn how to manage Image Mosaics and Image Pyramids in GeoServer.
Configuring an Image Mosaic
As introduced in a previous section an Image Mosaic is composed of a set of datasets which are exposed as a single coverage. The ImageMosaic format allows to automatically build and setup a mosaic from a set of georeferenced datasets. This section provides better instructions to configure an Image Mosaic
Note
Before you start, ensure that the Maps - Raster section has been completed.
We will configure an ImageMosaic using the optimized dataset. As explained in the Maps - Raster section, follow the steps 1 to 4, then at the step 5 fill the fields as explained below.
Specify a proper name (as an instance,
boulder_bg_optimized) in the Data Source Name field of the interface.Specify
file:<TRAINING_ROOT>/data/user_data/optimizedas URL of the sample data in the Connections Parameter’s - URL field.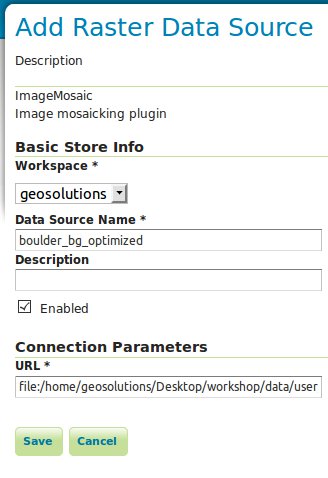
Click Save.
Publish the layer by clicking on the publish link.
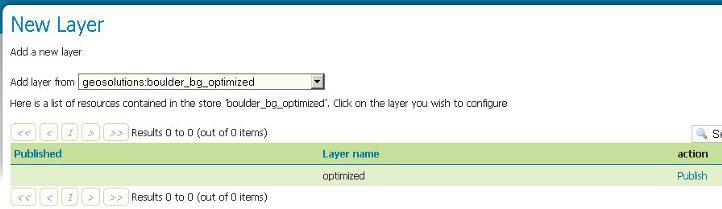
Set
boulder_bg_optimizedas name and title of the layer.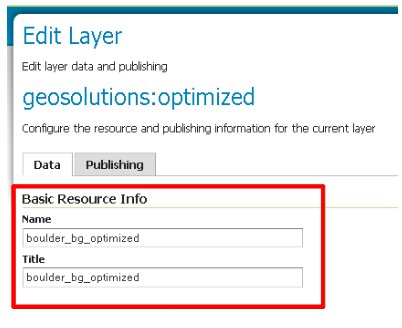
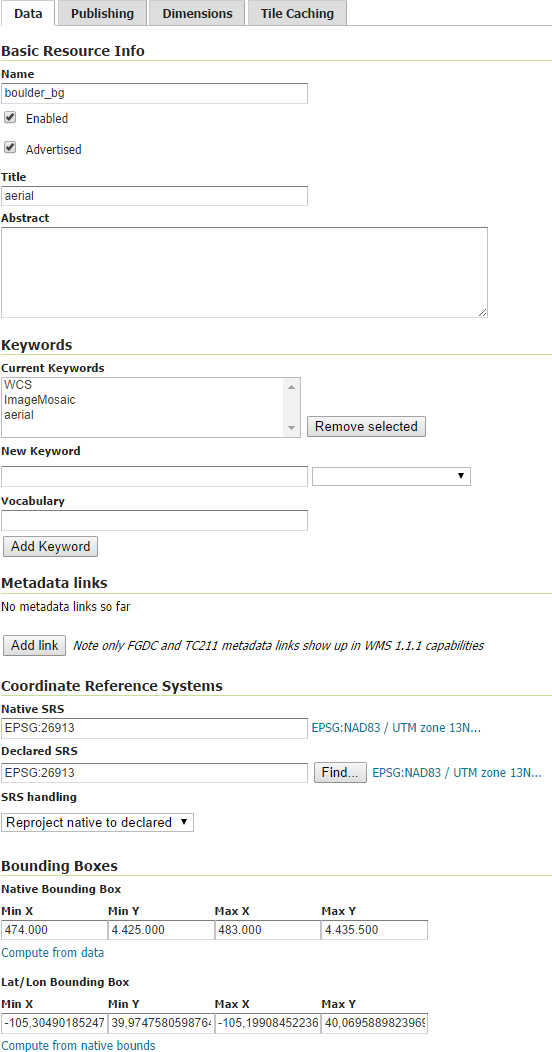
Check the Coordinate Reference Systems and the Bounding Boxes fields are properly set.
Customize the ImageMosaic properties if needed. For the sample mosaic, set the OutputTransparentColor to the value 000000 (Which is the Black color). click on Save when done.
- Accurate resolution computation: If true, compute the resolution of the granules in 9 points, the corners of the requested area and the middle points and take the better one. This will provide better results for cases where there is a lot more deformation on a subregion (top/bottom/sides) of the requested bbox with respect to others. Otherwise, compute the resolution using a basic affine scale transform.
- AllowMultithreading: If true, enable tiles multithreading loading. This allows to perform parallelized loading of the granules that compose the mosaic.
- BackgroundValues: Set the value of the mosaic background. Depending on the nature of the mosaic it is wise to set a value for the no data area (usually -9999). This value is repeated on all the mosaic bands.
- Bands: a comma separate list of band indexes that allows to expose only a particular subset of bands out of a multiband source. Normally not configured by hand, but driven by SLD styling instead.
- ExcessGranuleRemoval: An option that should be enabled when using scattered and deeply overlapping images. By default the image mosaic will try to mosaic toghether all images in the requested area, even if some are behind and won’t show up in the final image. With excess granule removal the system will use the image footprint to determine which granules actually contribute pixels to the output, and will end up performing the image processing only on those actually contributing. Best used along with footprints and sorting (to control which images actually stay on top). Possible values are
NONEorROI(Region Of Interest). - Filter: Filter granules based on attributes from the input coverage.
- Footprint Behavior: Set the behavior of the regions of a granule that are outside of the granule footprint. Can be
None(Ignore the footprint),Cut(Remove regions outside the footprint from the image. Does not add an alpha channel), orTransparent(Make regions outside the footprint completely transparent. Will add an alpha channel if one is not already present). Defaults toNone. More details are available in the dedicated chapter, Using the ImageMosaic plugin with footprint management. - InputTransparentColor: Set the transparent color for the granules prior to mosaicking them in order to control the superimposition process between them. When GeoServer composes the granules to satisfy the user request, some of them can overlap some others, therefore, setting this parameter with the opportune color avoids the overlap of no data areas between granules.
- MaxAllowedTiles: Set the maximum number of the tiles that can be load simultaneously for a request. In case of a large mosaic this parameter should be opportunely set to not saturating the server with too many granules loaded at the same time.
- MergeBehavior: Merging behaviour for the various granules of the mosaic that GeoServer will produce. This parameter controls whether we want to merge in a single mosaic or stack all the bands into the final mosaic.
- OVERVIEW_POLICY: Policy used to select the best matching overview for a given target output resolution. Possible values are QUALITY (pick an overview with a higher resolution and downsample), NEAREST (pick the one with the closest resolution), SPEED (pick the closest one with lower resolution) and IGNORE (do not use overviews).
- OutputTransparentColor: Set the transparent color for the created mosaic.
- SORTING: Allow to specify the time order of the obtained granules set. Valid values are DESC (descending) or ASC (ascending). Note that it works just using DBMS as indexes.
- SUGGESTED_TILE_SIZE: Controls the tile size of the input granules as well as the tile size of the output mosaic. It consists of two positive integers separated by a comma, like 512,512.
- USE_JAI_IMAGEREAD: If true, GeoServer will make use of JAI ImageRead operation and its deferred loading mechanism to load granules; if false, GeoServer will perform direct ImageIO read calls which will result in immediate loading.
At this point the ImageMosaic is being published with GeoServer. Next step is checking how the performances in accessing the datasets have been improved.
Click the Layer Preview link in the left GeoServer menu.
Look for a geosolutions:boulder_bg layer (the dataset without optimization) and click the OpenLayers link beside of it.

Play with the map preview by zooming and panning. When zooming, the response time isn’t immediate due to the access to the underlying big datasets which haven’t been optimized.
Return to the Layer Preview page.
Look for a geosolutions:boulder_bg_optimized layer (the optimized dataset with tiling and overviews set) and click the OpenLayers link beside of it.

Play with the map preview by zooming and panning:
- Check how the performances have been improved leveraging on both overviews and tiling.
- Note the better image quality of the lowest resolution views, having used an average interpolation algorithm when creating the overviews.
Configuring an Image Pyramid
GeoServer can efficiently deal with large TIFF with overviews, as long as the TIFF is below the 2GB size limit. Once the image size goes beyond such limit it’s time to start considering an image pyramid instead. An image pyramid builds multiple mosaics of images, each one at a different zoom level, making it so that each tile is stored in a separate file. This comes with a composition overhead to bring back the tiles into a single image, but can speed up image handling as each overview is tiled, and thus a sub-set of it can be accessed efficiently (as opposed to a single GeoTIFF, where the base level can be tiled, but the overviews never are).
Note
In order to build the pyramid we’ll use the gdal_retile.py utility, part of the GDAL command line utilities and available for various operating systems.
- Navigate to the workshop directory and create the bmpyramid directory into the <TRAINING_ROOT>\data\user_data directory
- From the command line run
Linux:
cd $TRAINING_ROOT/data/user_data
mkdir bmpyramid
gdal_retile.py -v -r bilinear -levels 4 -ps 2048 2048 -co "TILED=YES" -co "COMPRESS=JPEG" -targetDir bmpyramid bmreduced.tiff
Windows:
cd %TRAINING_ROOT%
cd %TRAINING_ROOT%\data\user_data\
mkdir bmpyramid
gdal_retile -v -r bilinear -levels 4 -ps 2048 2048 -co "TILED=YES" -co "COMPRESS=JPEG" -targetDir bmpyramid bmreduced.tiff
The gdal_retile.py user guide provides a detailed explanation for all the possible parameters, here is a description of the ones used in the command line above:
- -v: verbose output, allows the user to see each file creation scroll by, thus knowing progress is being made (a big pyramid construction can take hours)
- -r bilinear: use bilinear interpolation when building the lower resolution levels. This is key to get good image quality without asking GeoServer to perform expensive interpolations in memory
- -levels 4: the number of levels in the pyramid
- -ps 2048 2048: each tile in the pyramid will be a 2048x2048 GeoTIFF
- -co “TILED=YES”: each GeoTIFF tile in the pyramid will be inner tiled
- -co “COMPRESS=JPEG”: each GeoTIFF tile in the pyramid will be JPEG compressed (trades small size for higher performance, try out it without this parameter too)
- -targetDir bmpyramid: build the pyramid in the bmpyramid directory. The target directory must exist and be empty
- bmreduced.tiff: the source file
This will produce a number of TIFF files in bmpyramid along with the sub-directories 1, 2, 3, and 4.
Go to the Stores section an add a new
Raster Data Sourceclicking on ImagePyramid: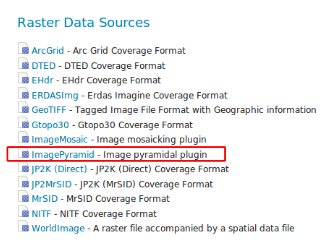
Adding a ImagePyramid Data Source
Warning
This assumes the GeoServer image pyramid plug-in is already installed. The pyramid is normally an extension.
If the ImagePyramid store is not available, before doing the exercise install the geoserver pyramid plugin from
%TRAINING_ROOT%/data/plugins/. Just decompress the zip file into%TRAINING_ROOT%/webapps/geoserver/WEB-INF/lib/and restart GeoServer.Specify a proper name (
bm_pyramid) in the Data Source Name field of the interface and specify a proper URL with the pyramid data directory
Windows:
file:%TRAINING_ROOT%\\data\\user_data\\bmpyramidLinux:
file: $TRAINING_ROOT/data/user_data/bmpyramid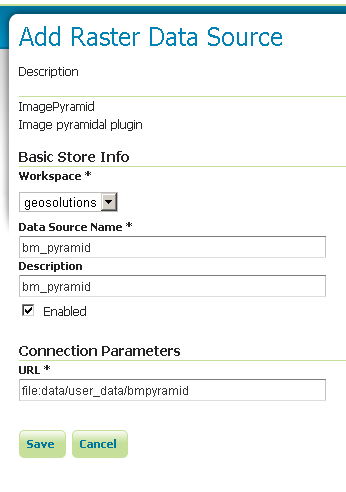
Configuring a image pyramid store
Click the Save button.
Note
When clicking save the store will look into the directory, recognize a
gdal_retilegenerated structure and perform some background operations:- move all tiff files in the root to a newly create directory 0 - create an image mosaic in all sub-directories (shapefile index plus property file) - create the root property file describing the whole pyramid structure
Publish the new pyramid created:
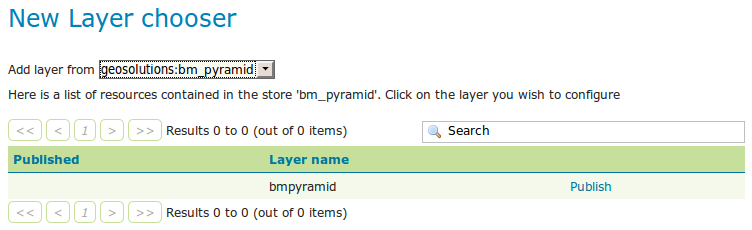
Choosing the coverage for publishing
Setup the layer parameter USE_JAI_IMAGEREAD to false to get better scalability: as told before the image loading using imageread is done using the JAI deferred mode so the data will be really loaded when are needed. This may cause many idle open ImageReaders, in case of having to deal with big pyramids (lots of granules over many levels) and it could cause performances issues.
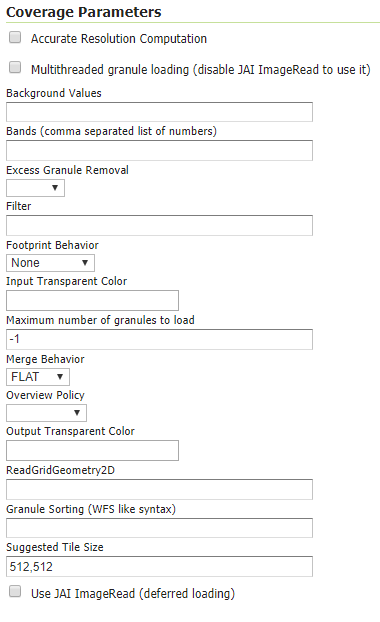
Tuning the pyramid parameters
Click Submit button and go to the GeoServer Map Preview to see the pyramid:
Previewing the pyramid