Process Chaining
GeoServer WPS implements also the Process Chaining. As the wording suggests, this is a method of “nesting” different processes inputs/outputs in order to get a chain of operations composing a unique more complex Process.
WPS Process Chaining is a way to:
- Feeding the output of a process into another process
- Allowing for tree-like composition
Lets see a couple of Process Chaining examples:
- Extract the rivers into the “restricted areas” polygons
- Extract the shape of the USA out of a raster, providing the
geosolutions:statesFeatureCollection
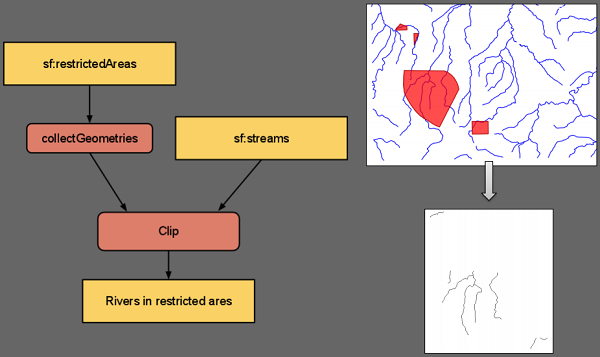
Chain 1: Extract the rivers into the “restricted areas” polygons
During this exercise we will perform a gs:Clip of the Vector Layer geosolutions:streams against the FeatureCollection collected from the Vector Layer geosolutions:restricted.
Vector clip and ship
Vector clip and ship
Once started the GeoServer, go to the
Demo WPS Request Builderinterface, and selectgs:Clipfrom the firstcombo-box. Select the Vector Layersf:streamsas input.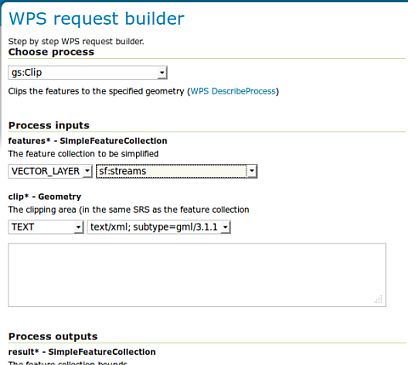
Now, for the
clipinput selectSUBPROCESSand then click onDefine/edit. Another WPS Builder dialog window should appear.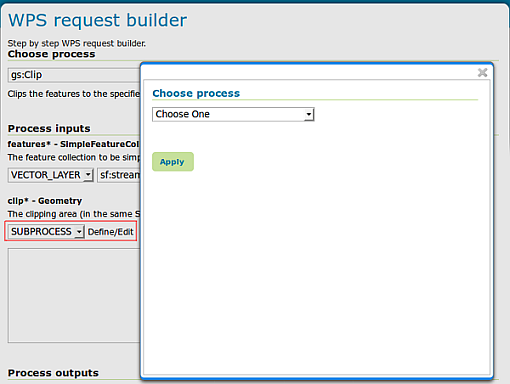
On the new WPS Browser window select the process
gs:CollectGeometriesusing the Vector Layersf:restricted, thenApply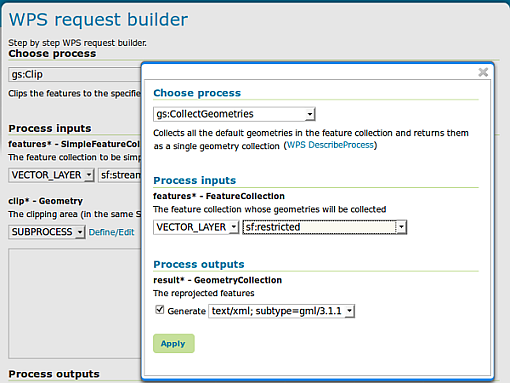
Finally select
application/zipas output format and thenExecute Process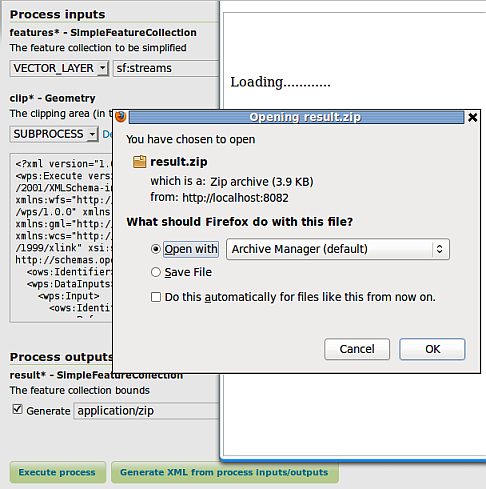
After few instants you will be able to download a zip file containing a shapefile. Open the latter using
uDigorQGisin order to inspect the outcomes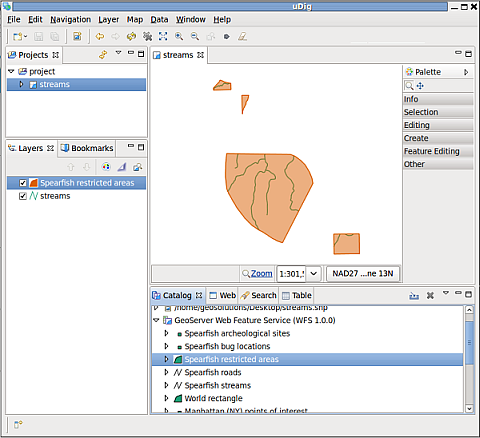
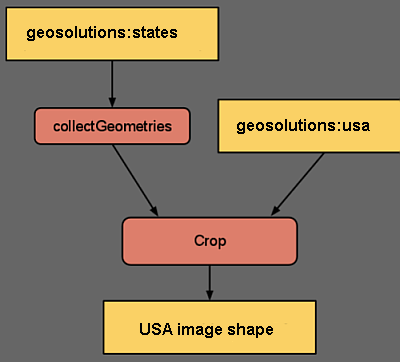
Chain 2: Extract the shape of the USA out of a raster, providing the geosolutions:states FeatureCollection
During this exercise we will perform a gs:CropCoverage of the Raster Layer geosolutions:usa against the FeatureCollection collected from the Vector Layer geosolutions:states.
Raster clip and ship
Raster clip and ship
Once started the GeoServer, go to the
Demo WPS Request Builderinterface, and selectgs:CropCoveragefrom the firstcombo-box. Select the Raster Layergeosolutions:usaas input.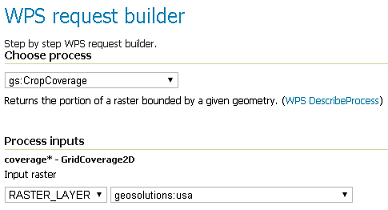
Now, for the
cropGeometryinput selectSUBPROCESSand then click onDefine/edit. Another WPS Builder dialog window should appear. On the new WPS Browser window select the processgs:CollectGeometriesusing the Vector Layergeosolutions:states, thenApply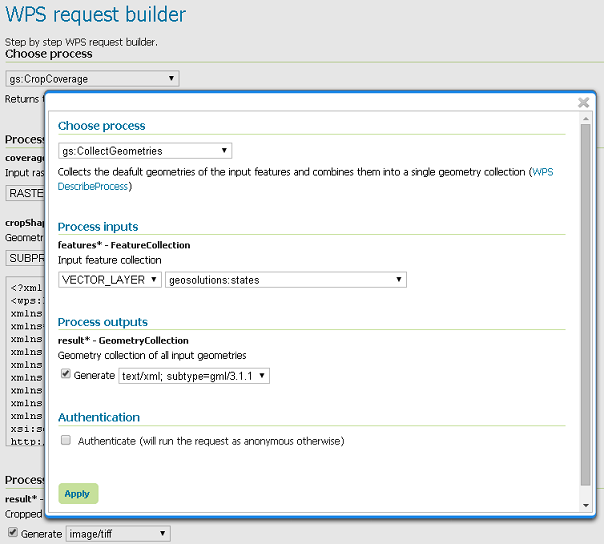
Leave
image/tiffas output format for the Process and proceed with theExecute Process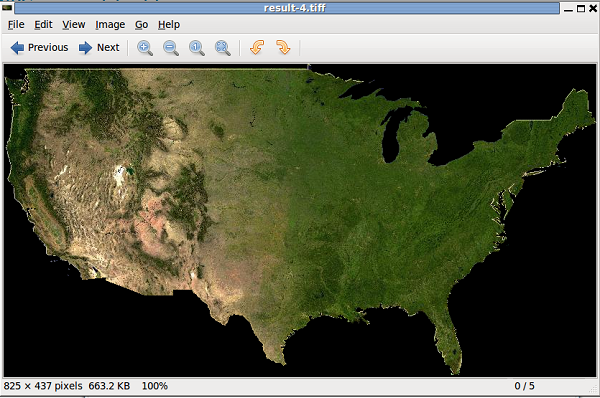
GeoServer “Direct data integration” and “Store back”” capabilities through gs:Import
Direct data integration
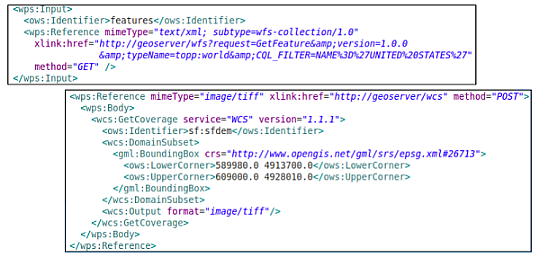
The WPS normally streams input data from remote WFS/WCS, parsing GML/GeoJSON or GeoTiff/ArcGrid. On the GeoServer implementation when the source is local we can dodge it though, read directly from the source (shapefile, DBMS, geotiff).
The following two special functions do the trick
http://geoserver/wfs; url for local WFS accesshttp://geoserver/wcs; url for local WCS access
Store Back with gs:Import
The gs:Import WPS process along with Process Chaining can be successfully used to store back the outcomes as new GeoServer resources/layers.
gs:Import saves the vector results into a store of choice, and publish as a layer. The new resource can be used right away from WMS/WFS/WCS/WPS.
Warning
At this time GeoServer is still missing the equivalent for rasters.
As an example, we will now store back into GeoServer the layer of reduced sf:roads created in the section Vector Processes
Once started the GeoServer, go to the
Demo WPS Request Builderinterface, and selectgs:Importfrom the firstcombo-box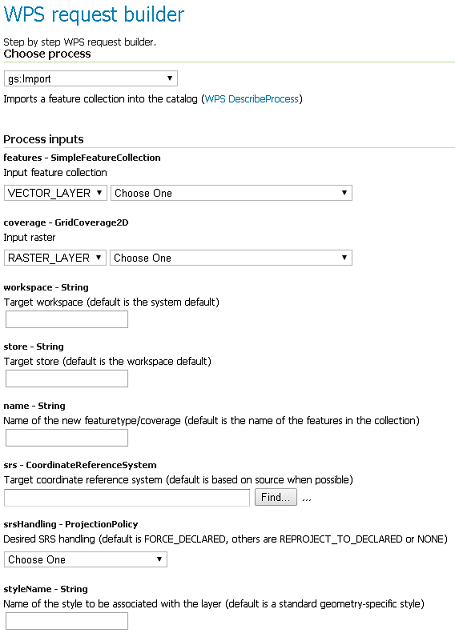
As input for
featuresselectSUBPROCESS, click onDetails/editand configure ags:Clipprocess on the Vector Layersf:roadsfollowing the steps at Vector Processes section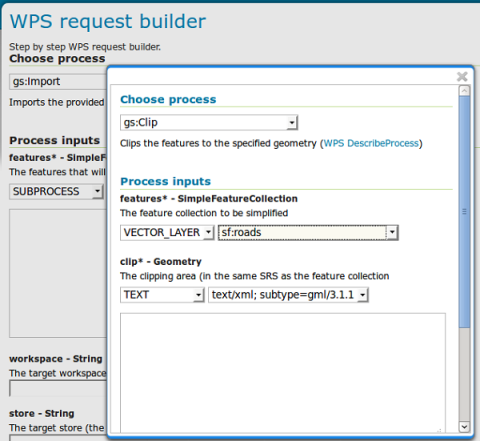
Warning
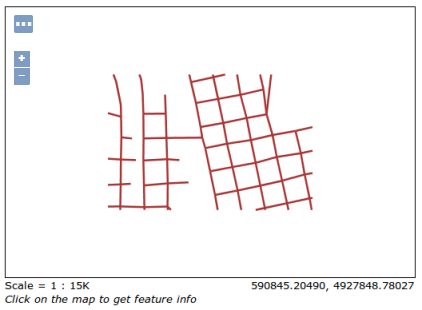
Don’t forget to specify the clipping geometry as WKT:
POLYGON((589800.30577 4927510.97152, 589800.30577 4926799.69435, 590874.57957 4926799.69435, 590874.57957 4927510.97152, 589800.30577 4927510.97152))
Click on
Applyin order to let the Demo WPS Builder insert the Execute Process XML of thegs:Clipchained sub-process into thetext-area
Fill in the other attributes
workspace; geosolutionsstore; boulder_shapefilesname; roads_clippedsrs; EPSG:26713 (thesf:roadsnative one)style; line (the default style to be assigned to the layer)
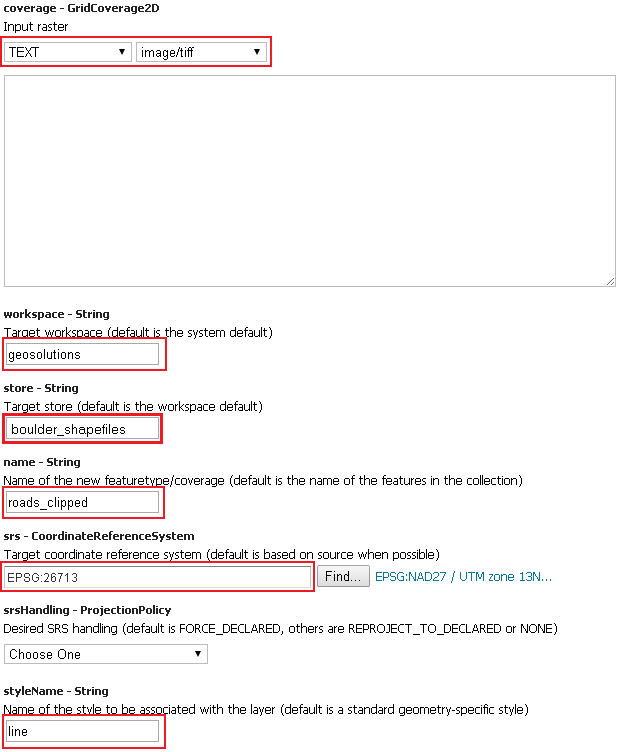
Warning
If you see a coverage - GridCoverage2D input, set it to TEXT image/Tiff and leave the textbox blank.
Click on the
Execute Processand when finished check through the GeoServerLayer Previewthat the new layer has been created and is clipped